Durst Workflow Prepress
Take your data preparation to a new level
Durst Workflow Prepress is a tailor-made solution for the printing industry to prepare customer data for printing and finishing. Data preparation typically requires recurring tasks that can now be automated, therefore freeing up valuable time for other tasks.
With Durst Workflow Prepress you can combine exactly that, automation as well as product specific data preparation to save valuable time and production costs.

transfer data and associated order information to the Workflow via the Rest API.
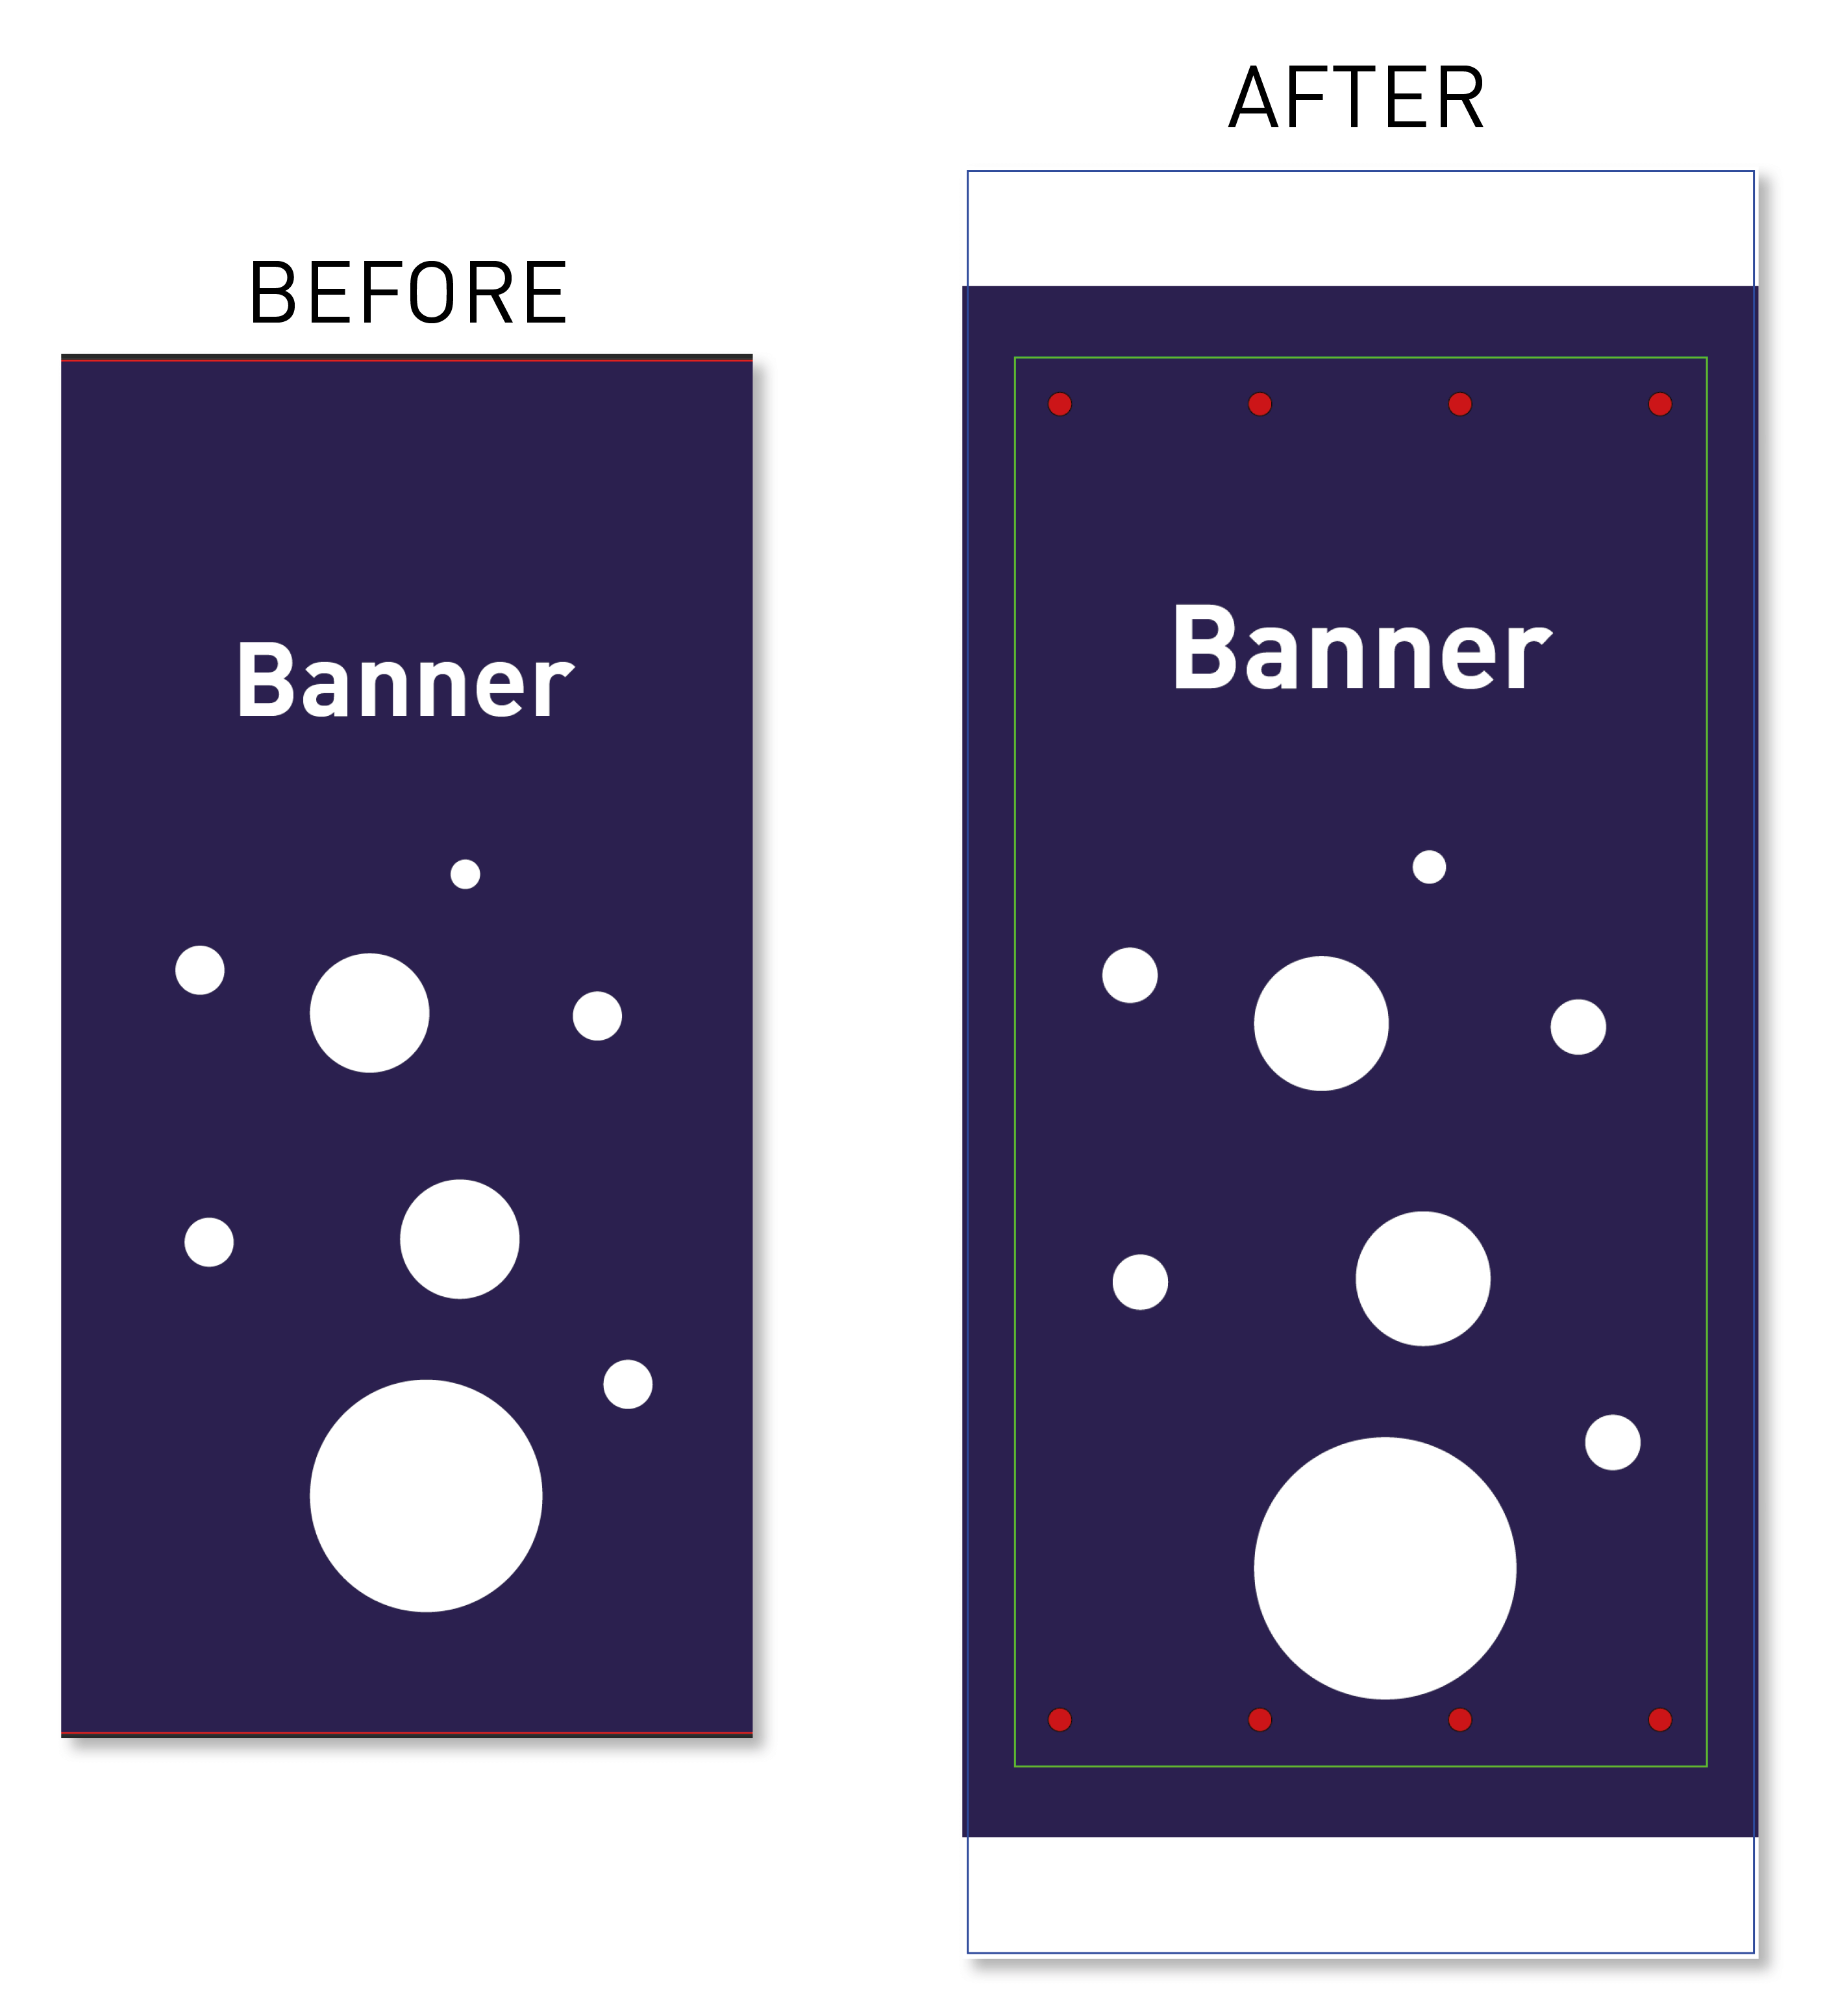
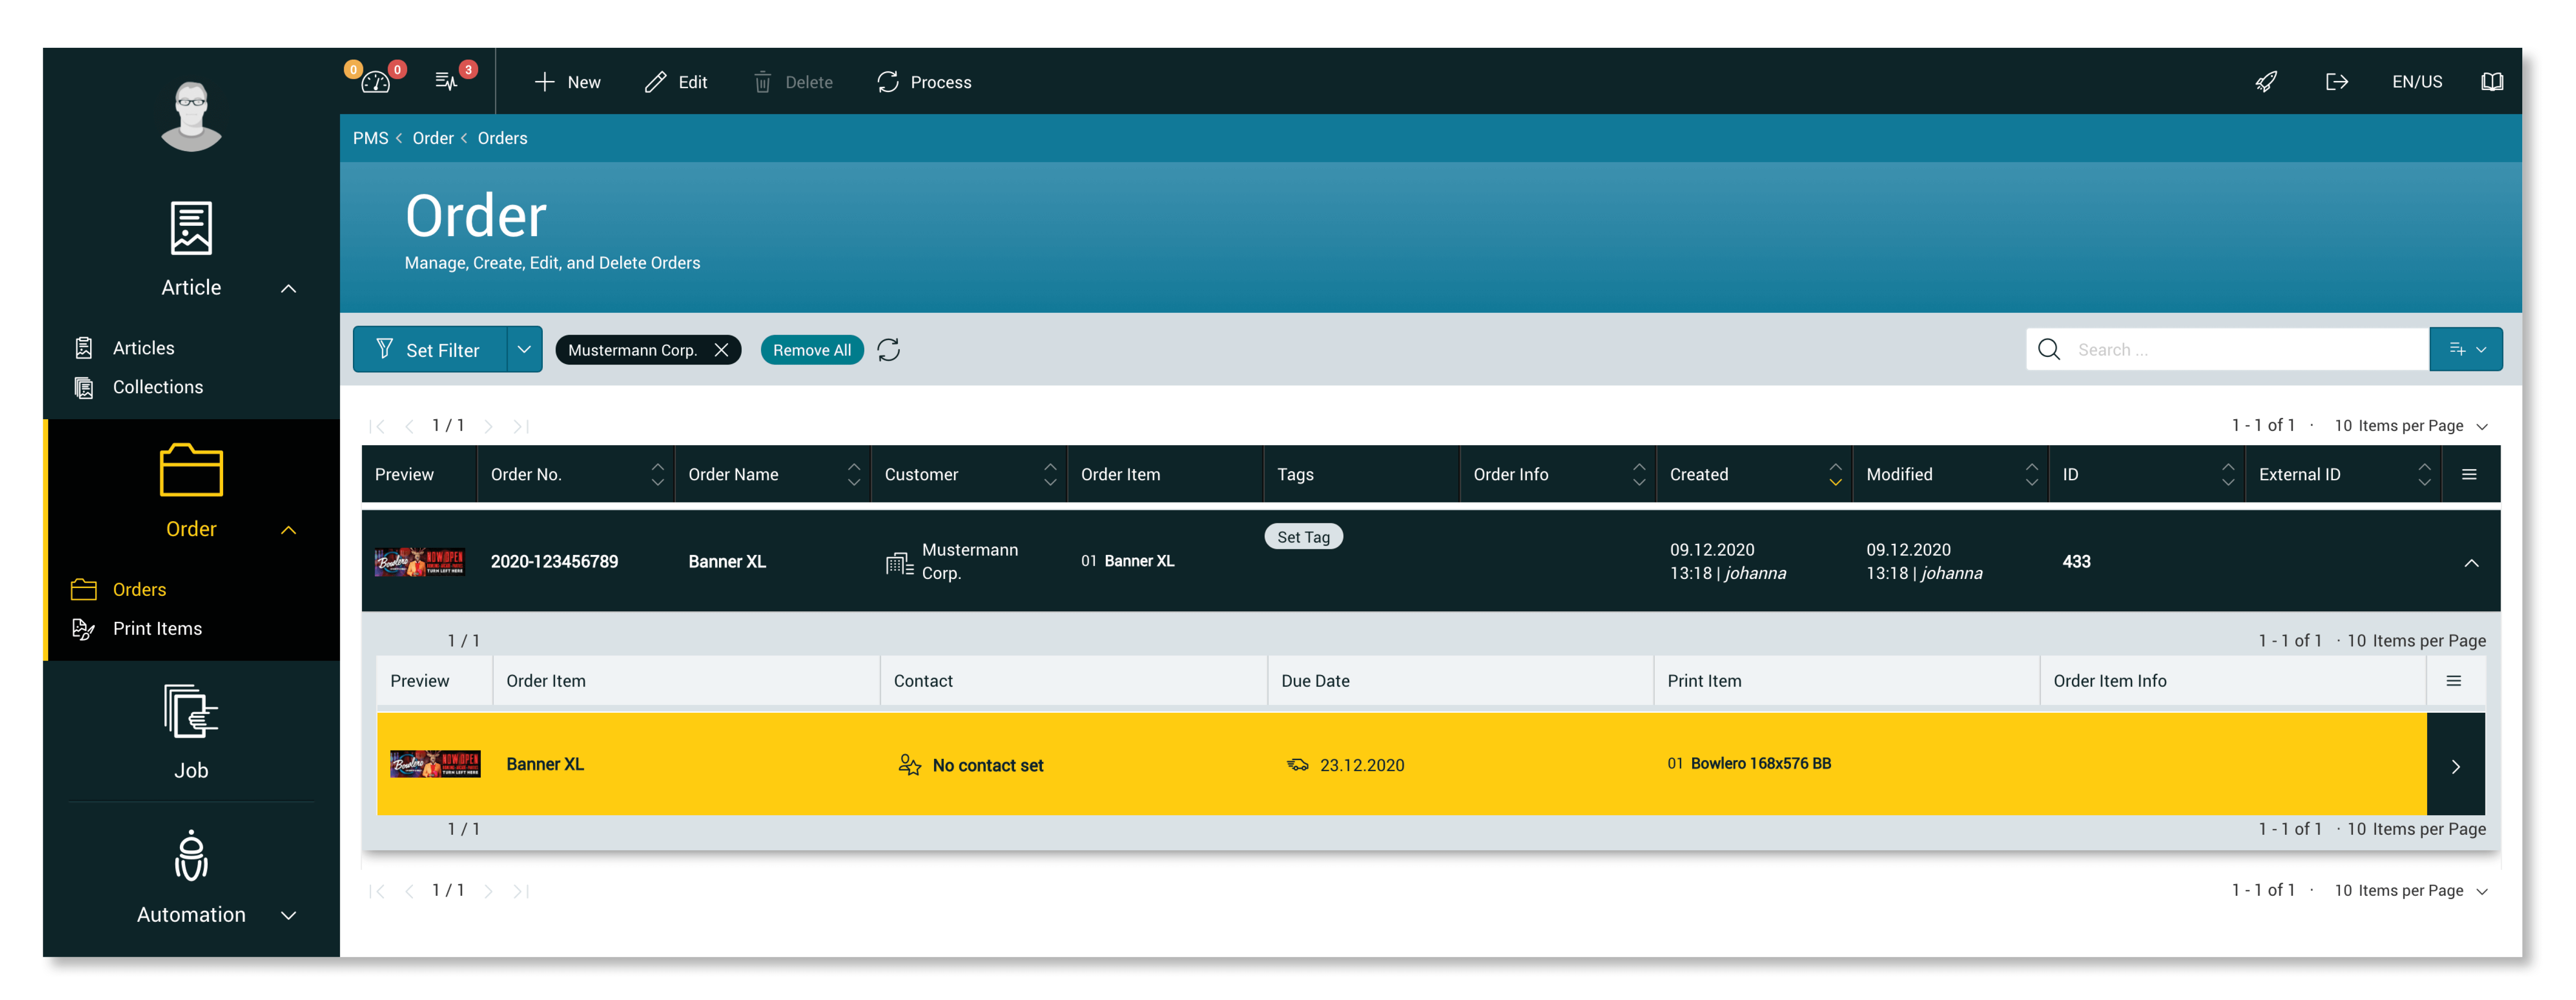
In the Workflow, an orders are created with an order number, the associated customer information and the print data. The print data passesthrough a preflight, whereby defined corrections, such as set white objects to knockout and much more, are applied to normalize data and display production-relevant information. Errors and warnings that occur can becorrected by the user by applying additional corrections. For products such as banners, the same data preparation steps such as: edge reinforcement, adding grommets and a Dieline are routine. Such processes can be automated using Fixup Chains. This gives the prepress department more time to deal with other time consuming activities. Fixup Chains are created once and can consist of any number of corrections with the using pre-defined values. The user can create one or more cutting device(s) with cutting parameters. Fixup Chains and cutting parameters can be stored for individual products. The only thing missing is assembling the data to be printed. Using the Workfow Prepress select various impose modes by opening the Impose Editor. In the Nesting mode, the user has a multitude of settings available; such as single, multiple or double- side output, spacing between the print items and much more. If there are multiple orders in a production job, the user can add a Caption, which can be output as text or in the form of a QR or Barcode. Placeholders containing information from the Workflow are available to the user for the Captions. Imposition settings can also be saved in a template and using an integration solution, be controlled by the leading system. If templates are used throughout the Prepress Workflow, the user can automate the majority of prepress tasks.

RIP of your choice. The communication to the printer is performed by the RIP.
The Durst Prepress Workflow can be used manual, semi- or fully automated. If the Workflow is connected to a leading system via an integration solution, information about the order, the customer and the production can be forwarded directly. In the Workflow, an orders are created with an order number, the associated customer information and the print data. The print data passes through a preflight, whereby defined corrections, such as set white objects to knockout and much more, are applied to normalize data and display production-relevant information. Errors and warnings that occur can be corrected by the user by applying additional corrections. For products such as banners, the same data preparation steps such as: edge reinforcement, adding grommets and a Dieline are routine. Such processes can be automated using Fixup Chains. This gives the prepress department more time to deal with other time consuming activities. Fixup Chains are created once and can consist of any number of corrections with the using pre-defined values. The user can create one or more cutting device(s) with cutting parameters. Fixup Chains and cutting parameters can be stored for individual products. The only thing missing is assembling the data to be printed. Using the Workfow Prepress select various impose modes by opening the Impose Editor. In the Nesting mode, the user has a multitude of settings available; such as single, multiple or double-side output, spacing between the print items and much more. If there are multiple orders in a production job, the user can add a Caption, which can be output as text or in the form of a QR or Barcode. Placeholders containing information from the Workflow are available to the user for the Captions. Imposition settings can also be saved in a template and using an integration solution, be controlled by the leading system. If templates are used throughout the Prepress Workflow, the user can automate the majority of prepress tasks.
It all starts with a sales order that is created in an ERP or MIS. This leading system can transfer data and associated order information to the Workflow via the Rest API.
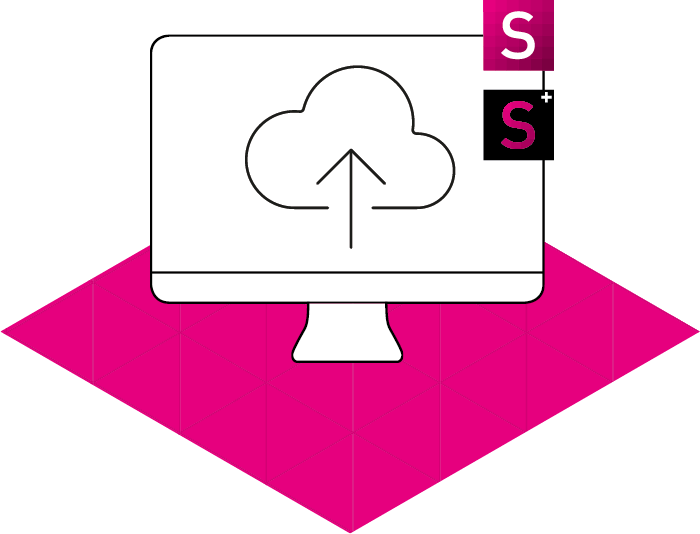
The end customer could create their order in a Smart Shop. All existing information can also be transferred to the Workflow through our integration solution. For more information about the Smart Shop, please visit the DPS Website.
The Durst Prepress Workflow can be used manual, semi- or fully automated. If the Workflow is connected to a leading system via an integration solution, information about the order, the customer and the production can be forwarded directly. In the Workflow, an orders are created with an order number, the associated customer information and the print data. The print data passesthrough a preflight, whereby defined corrections, such as set white objects to knockout and much more, are applied to normalize data and display production-relevant information.
Errors and warnings that occur can becorrected by the user by applying additional corrections. For products such as banners, the same data preparation steps such as: edge reinforcement, adding grommets and a Dieline are routine. Such processes can be automated using Fixup Chains. This gives the prepress department more time to deal with other time consuming activities. Fixup Chains are created once and can consist of any number of corrections with the using pre-defined values. The user can create one or more cutting device(s) with cutting parameters.
Fixup Chains and cutting parameters can be stored for individual products.
The only thing missing is assembling the data to be printed. Using the Workfow Prepress select various impose modes by opening the Impose Editor.
In the Nesting mode, the user has a multitude of settings available; such as single, multiple or double- side output, spacing between the print items and much more. If there are multiple orders in a production job, the user can add a Caption, which can be output as text or in the form of a QR or Barcode.
Placeholders containing information from the Workflow are available to the user for the Captions. Imposition settings can also be saved in a template and using an integration solution, be controlled by the leading system. If templates are used throughout the Prepress Workflow, the user can automate the majority of prepress tasks.
The Durst Prepress Workflow can be used manual, semi- or fully automated. If the Workflow is connected to a leading system via an integration solution, information about the order, the customer and the production can be forwarded directly. In the Workflow, an orders are created with an order number, the associated customer information and the print data. The print data passes through a preflight, whereby defined corrections, such as set white objects to knockout and much more, are applied to normalize data and display production-relevant information. Errors and warnings that occur can be corrected by the user by applying additional corrections. For products such as banners, the same data preparation steps such as: edge reinforcement, adding grommets and a Dieline are routine. Such processes can be automated using Fixup Chains. This gives the prepress department more time to deal with other time consuming activities. Fixup Chains are created once and can consist of any number of corrections with the using pre-defined values. The user can create one or more cutting device(s) with cutting parameters. Fixup Chains and cutting parameters can be stored for individual products. The only thing missing is assembling the data to be printed. Using the Workfow Prepress select various impose modes by opening the Impose Editor. In the Nesting mode, the user has a multitude of settings available; such as single, multiple or double-side output, spacing between the print items and much more. If there are multiple orders in a production job, the user can add a Caption, which can be output as text or in the form of a QR or Barcode. Placeholders containing information from the Workflow are available to the user for the Captions. Imposition settings can also be saved in a template and using an integration solution, be controlled by the leading system. If templates are used throughout the Prepress Workflow, the user can automate the majority of prepress tasks.
DATA PREPARATION AND PREPRESS AUTOMATION
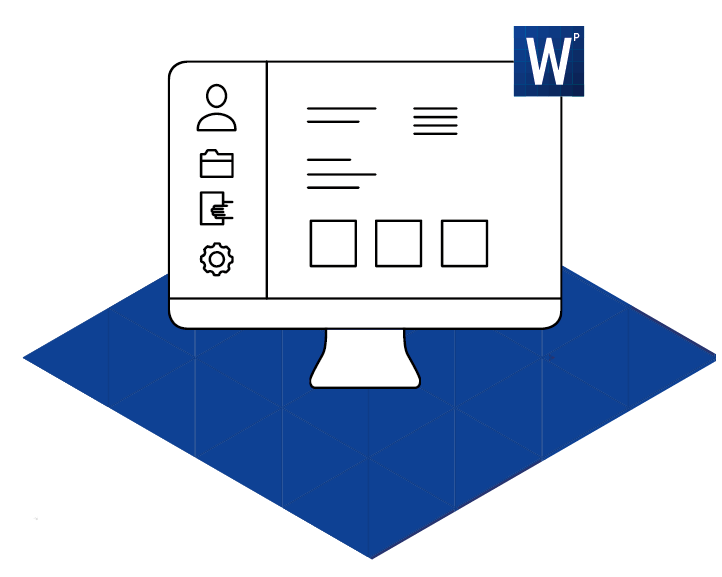
ADOBE ILLUSTRATOR PLUG-IN
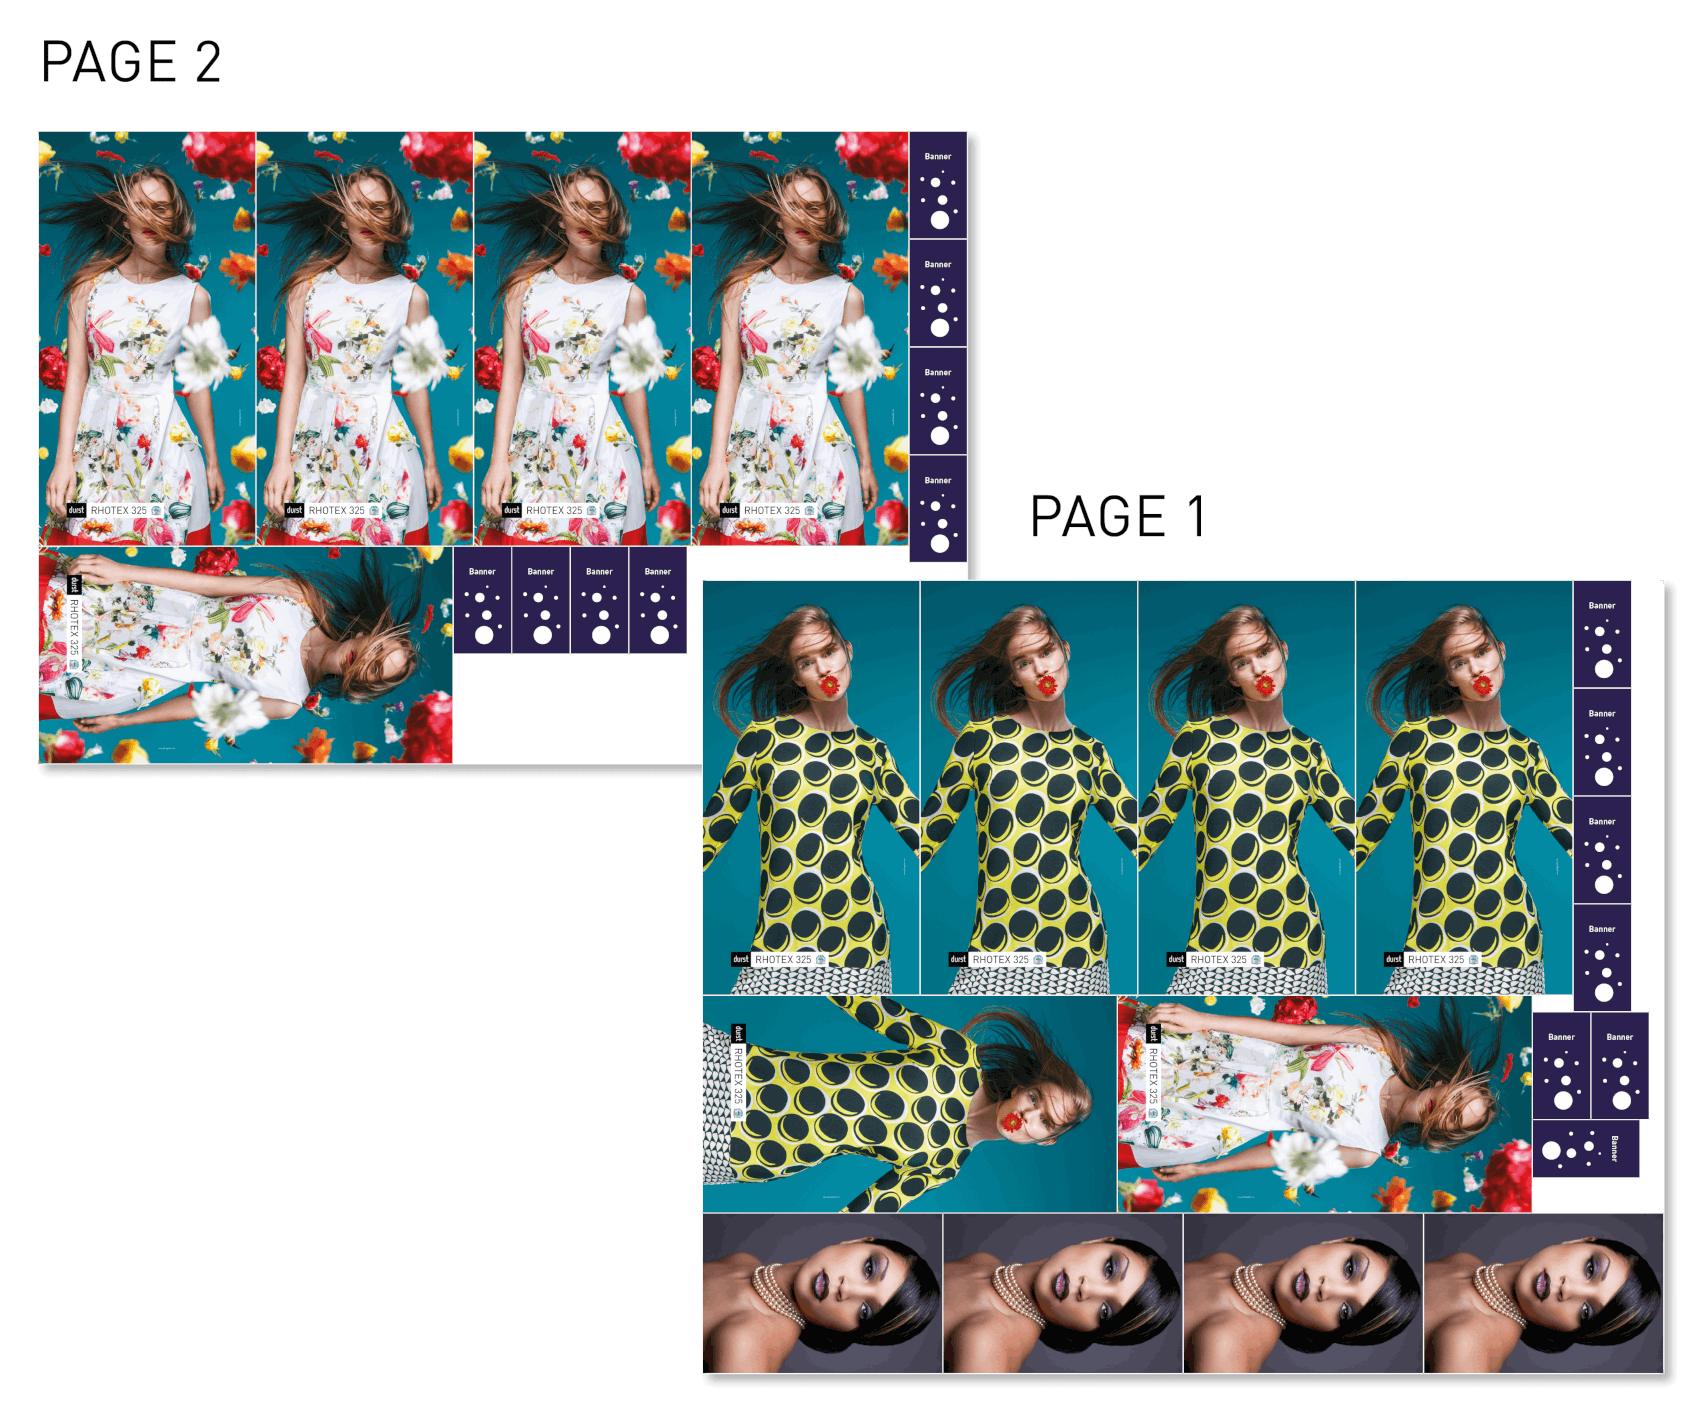
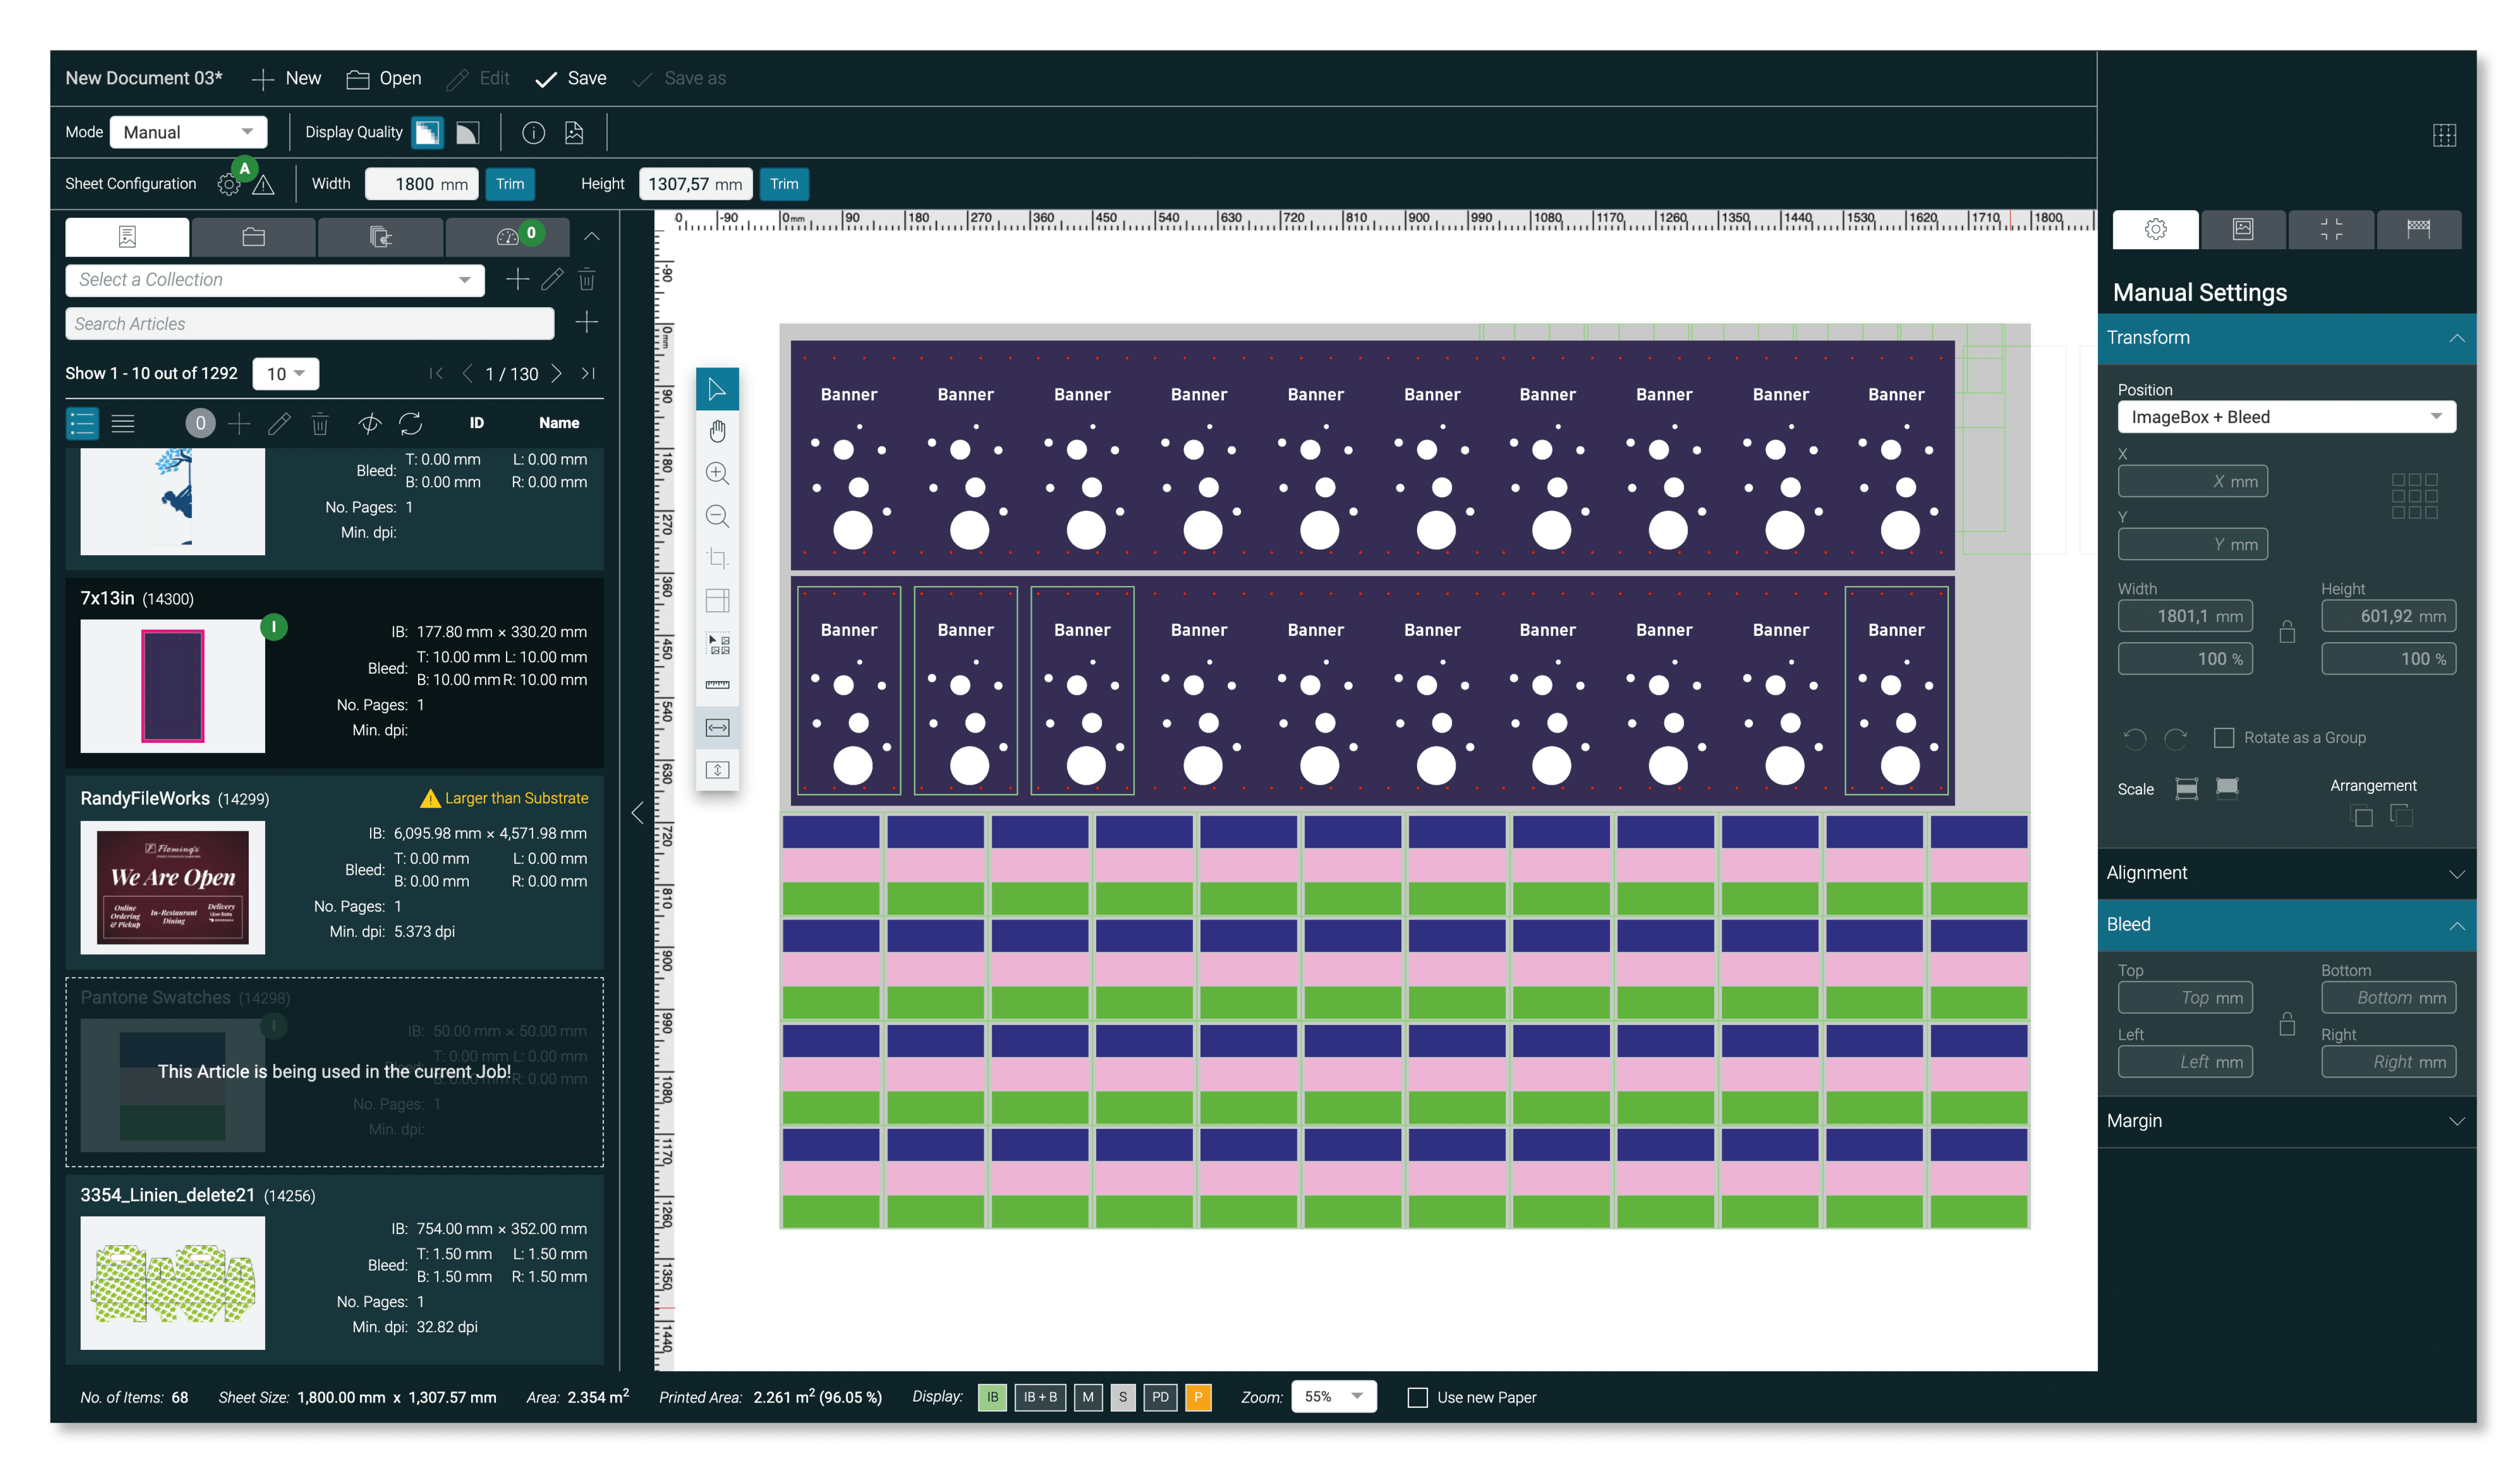
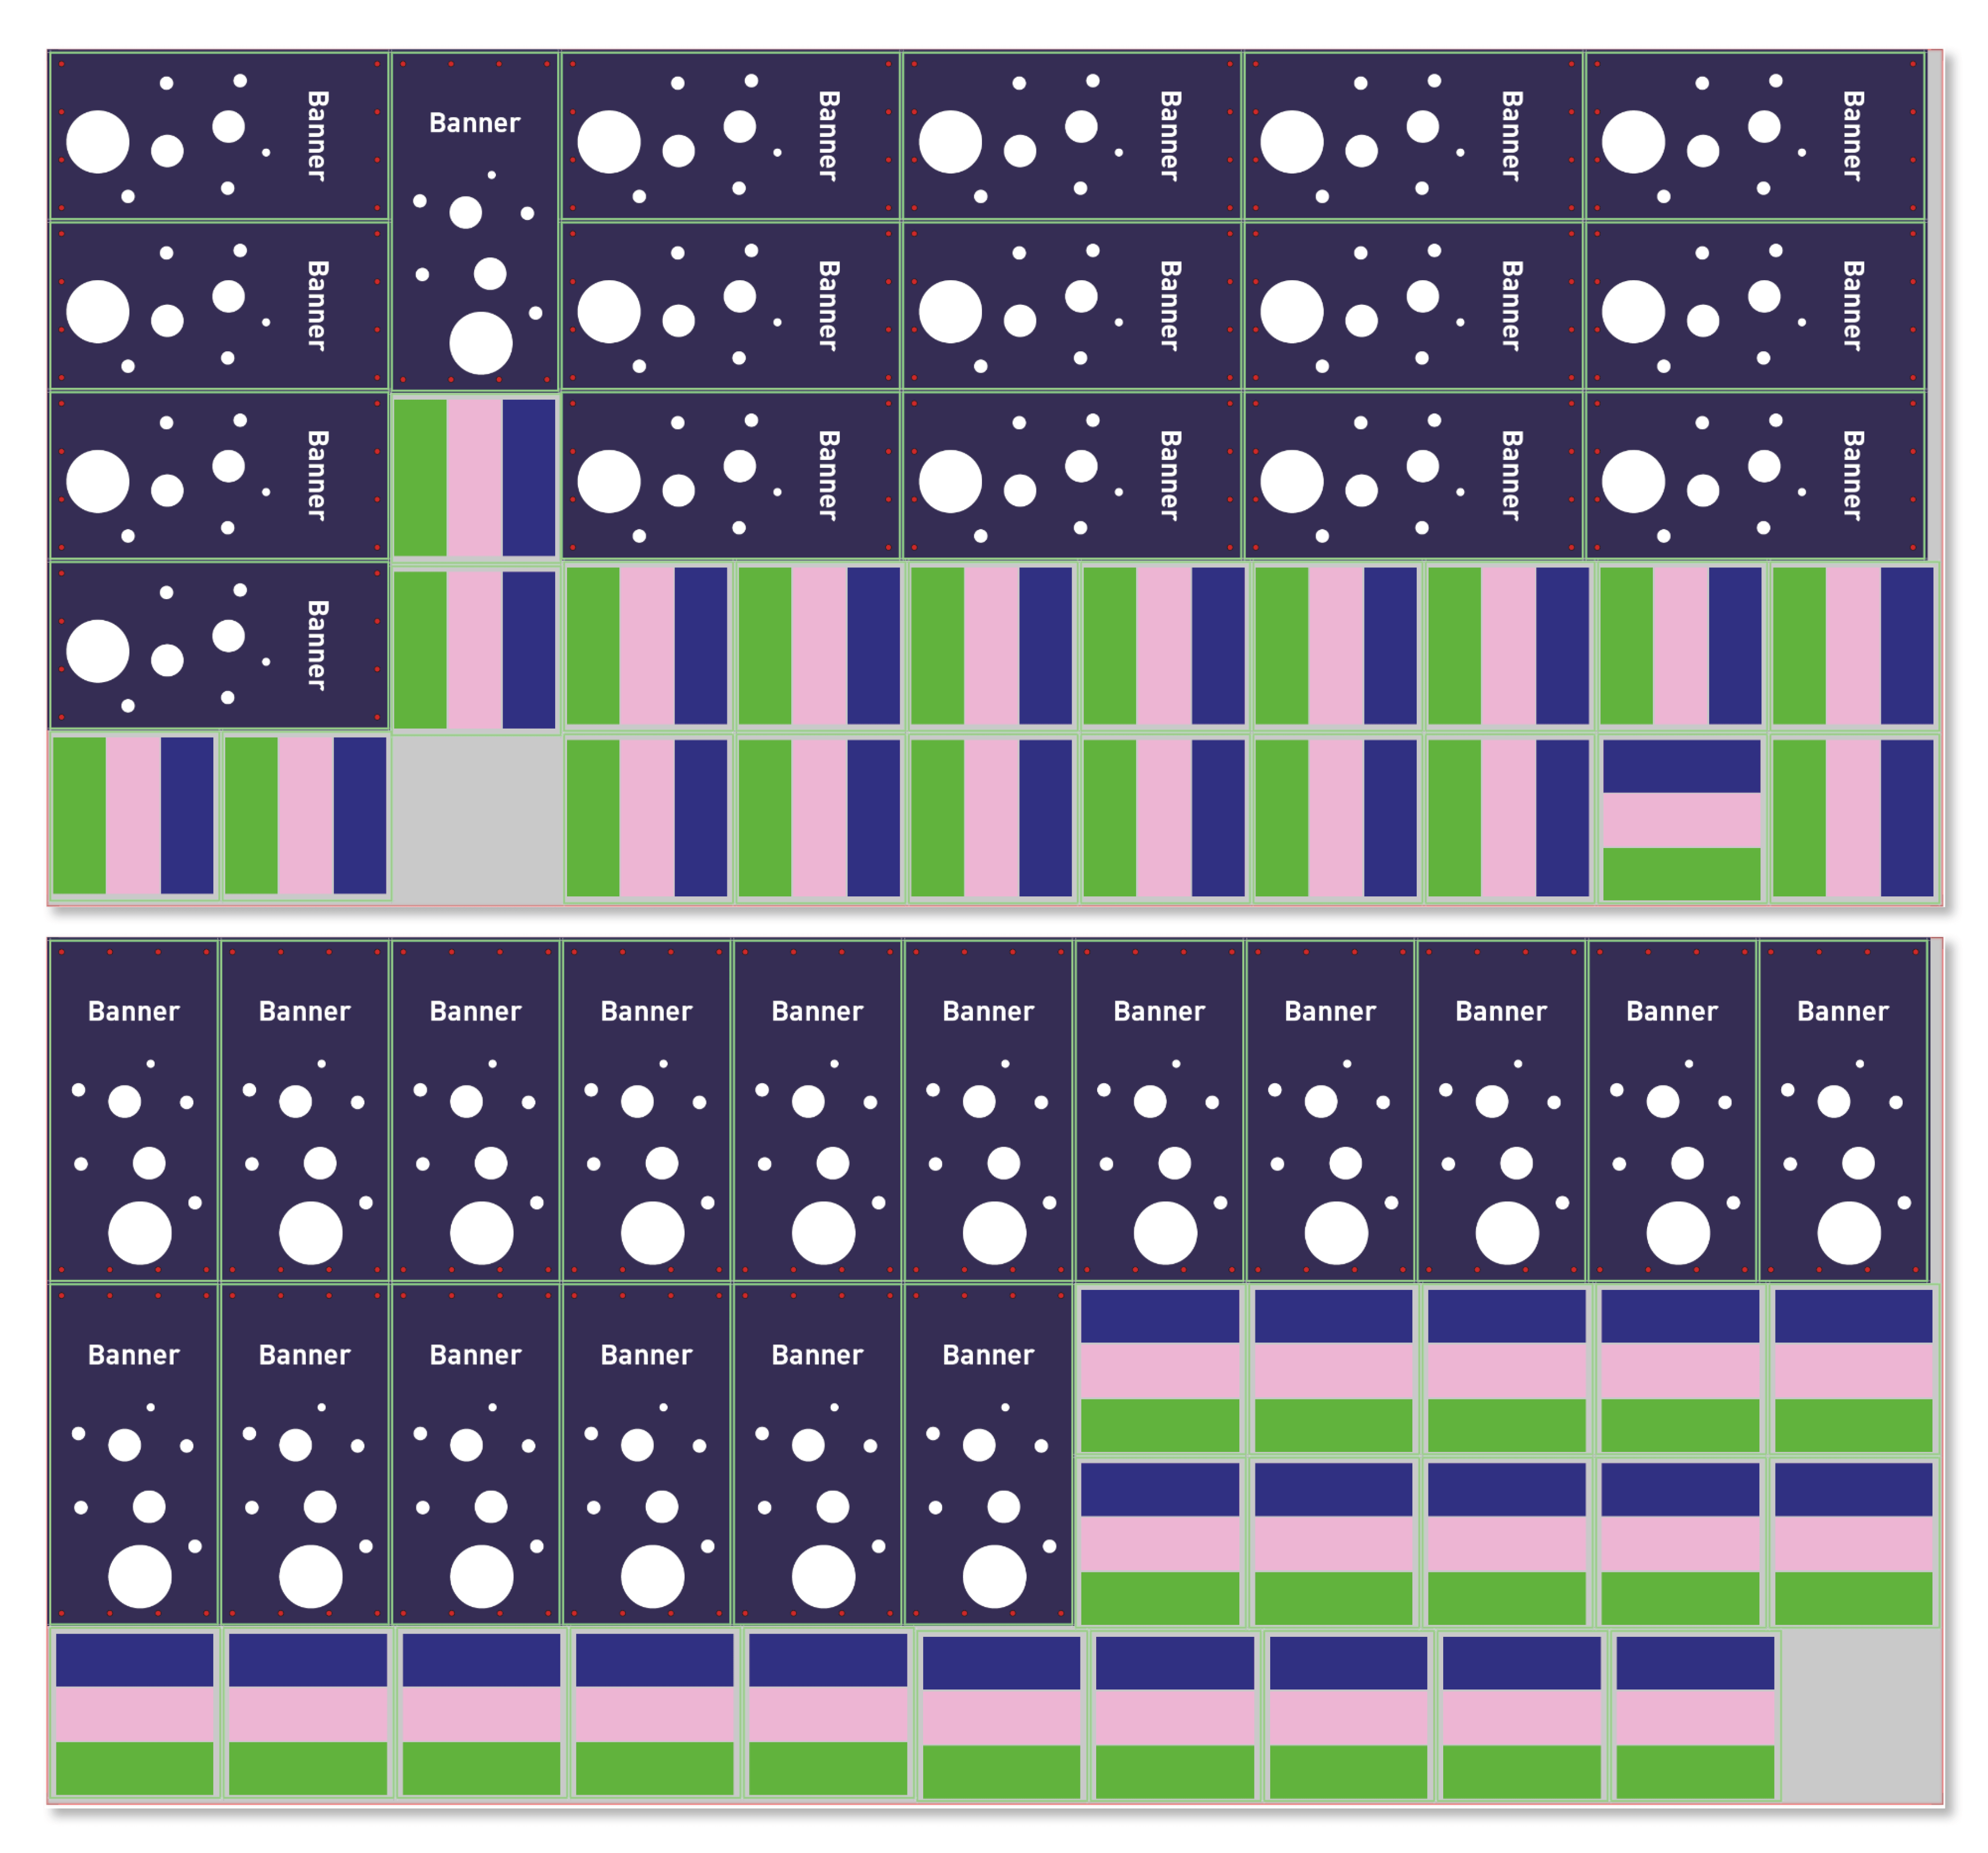
MULTIPAGE NESTING
print data that cannot be mounted
on one mounting sheet or on a defined
production length, a multi-page output
is available. In a multi-page output, all
print data from the Production Job are
mounted according to the selected sort
criteria.
APPROVAL REPORT

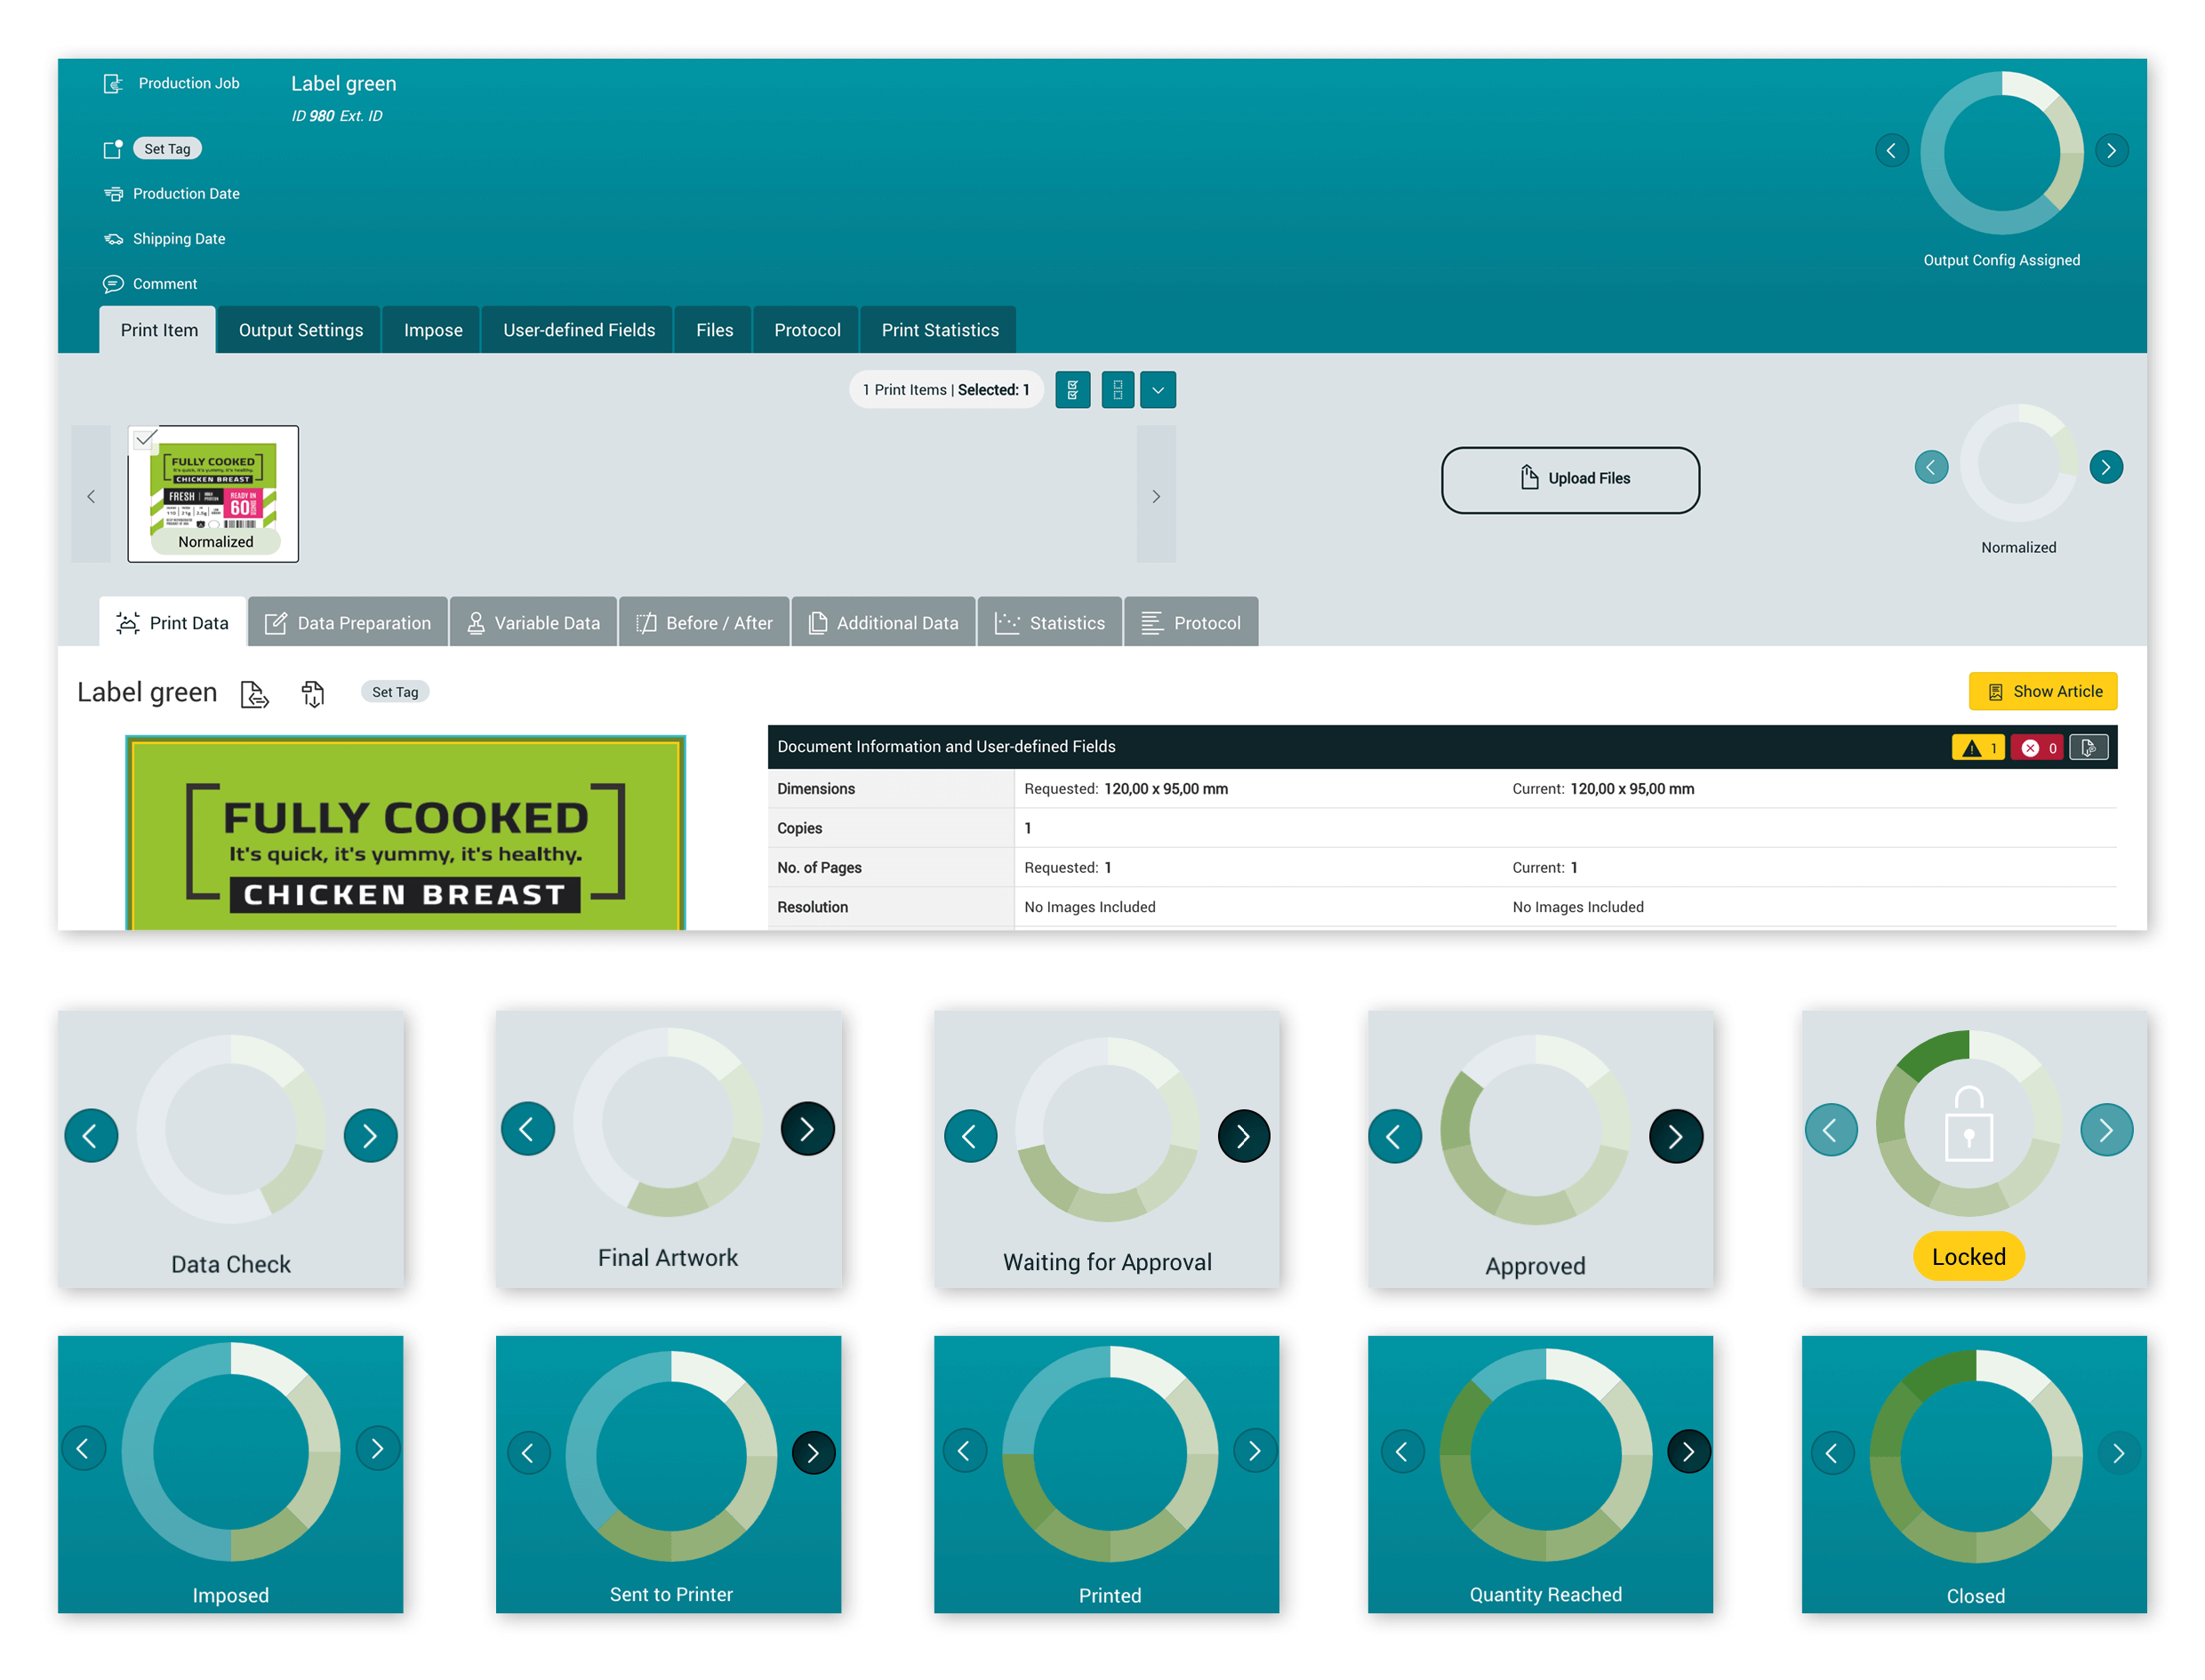
PREFLIGHT
PREFLIGHT
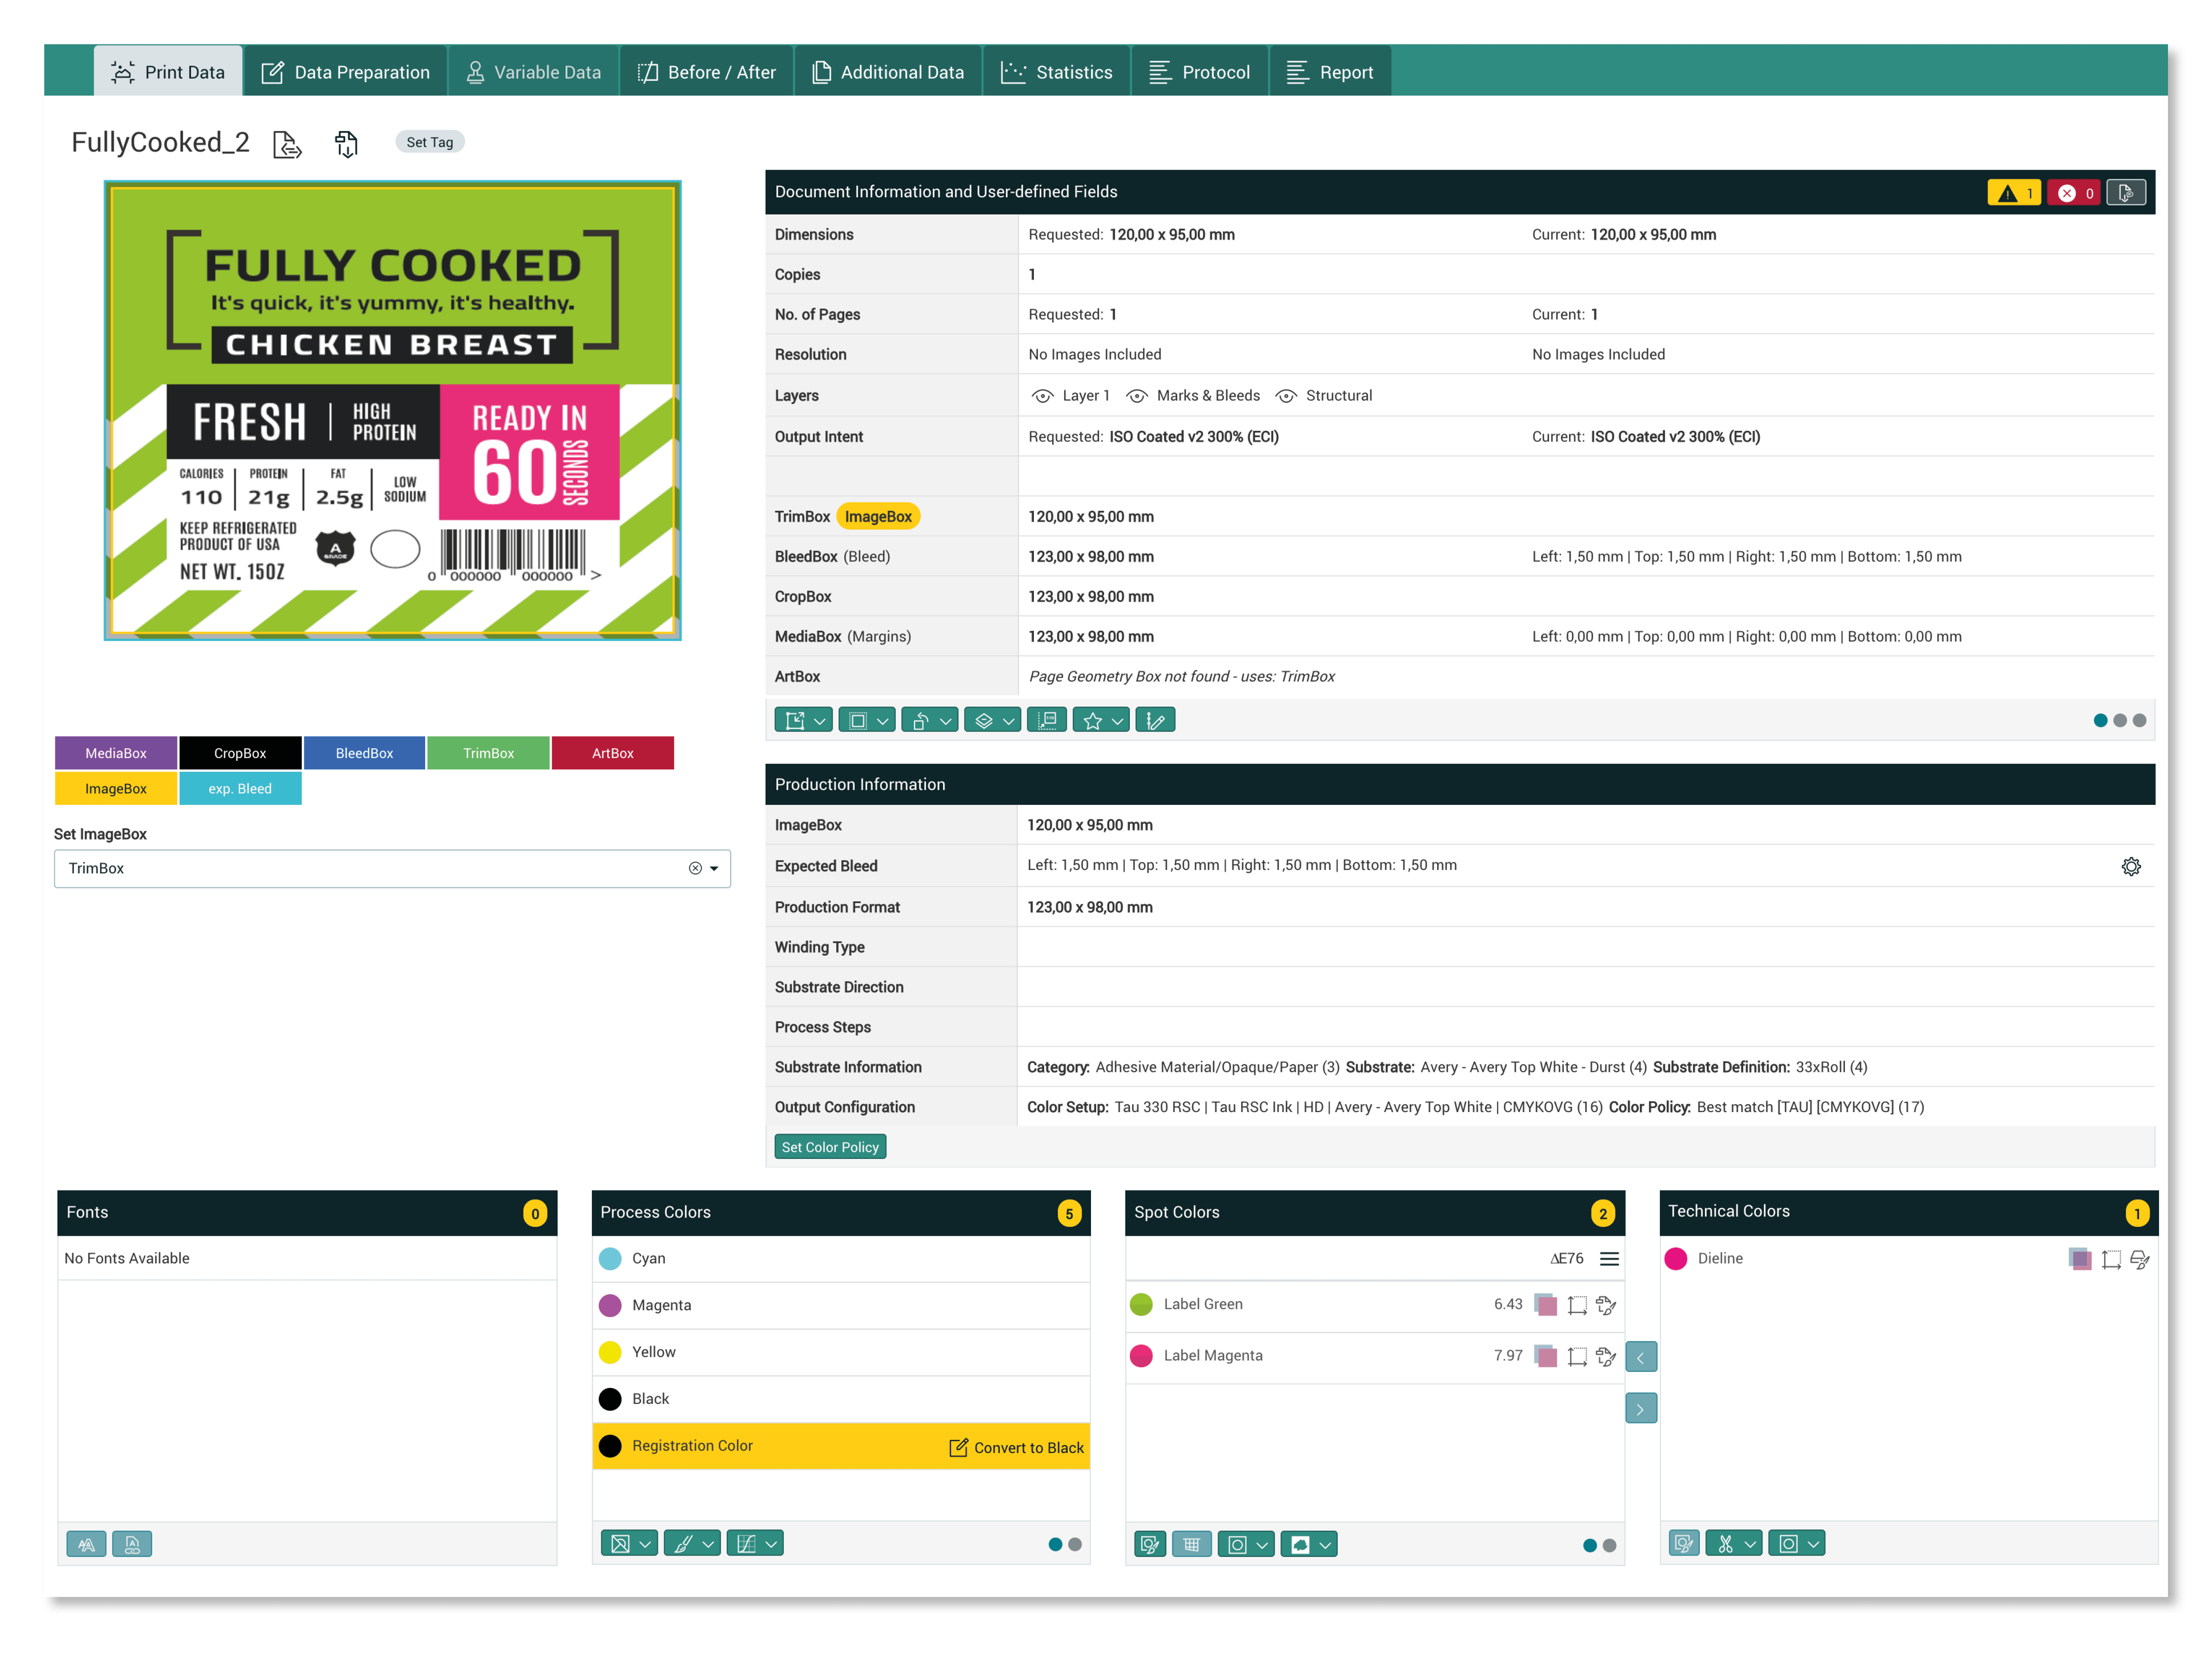
In the background, approximately 100 different checks and corrections are run, which can be stored system-wide. Corrections such as set white objects to knockout or convert registration color to K are available. The results are then displayed in detail and clearly in the print data overview.

USER MANAGEMENT
USER MANAGEMENT
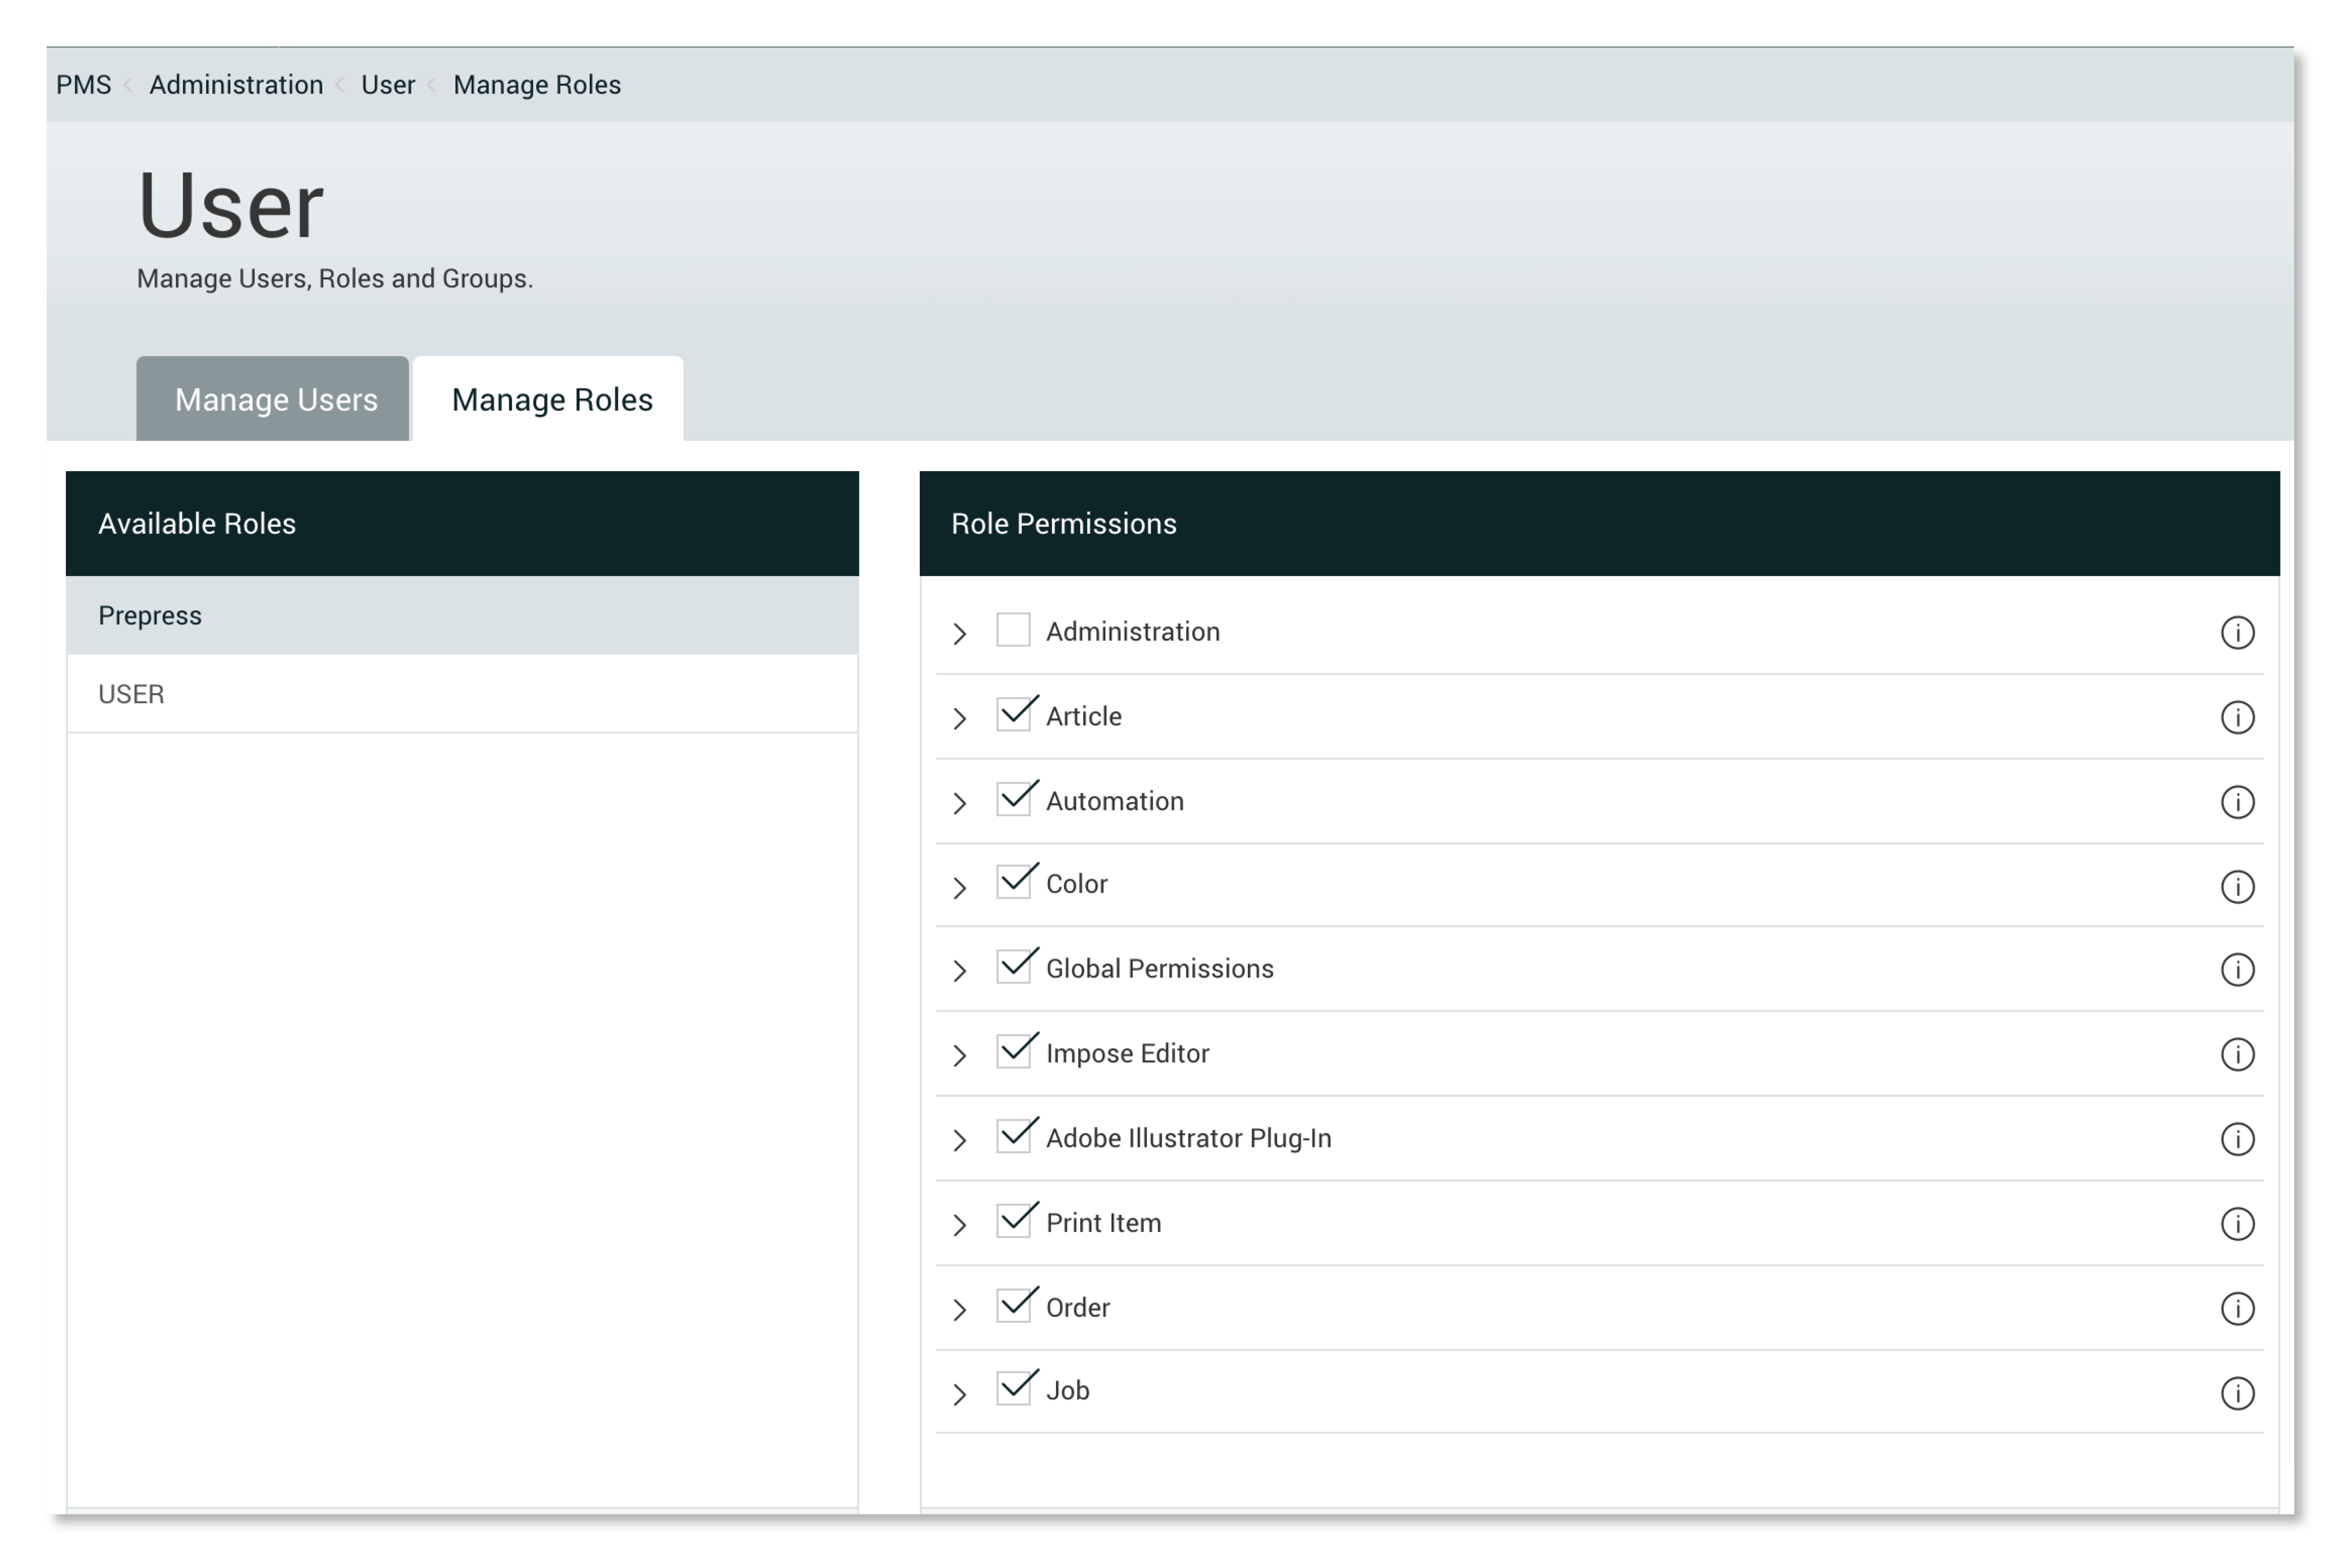
For example, a sales representative can upload print data to see if it can be produced, but is not allowed to edit or change it. The prepress department has unlimited access to production-related areas. The color specialist is allowed access to create, review and apply profiles. Furthermore, the Workflow can track who last modified print data.

IMPOSITION
IMPOSITION
In each of the mentioned modes, the user can apply production-specific settings. Additionally, Captions can be added in text or barcode form as well as the required cutting marks. This can all be saved in a template and used for automated production.

VARIABLE DATA
VARIABLE DATE
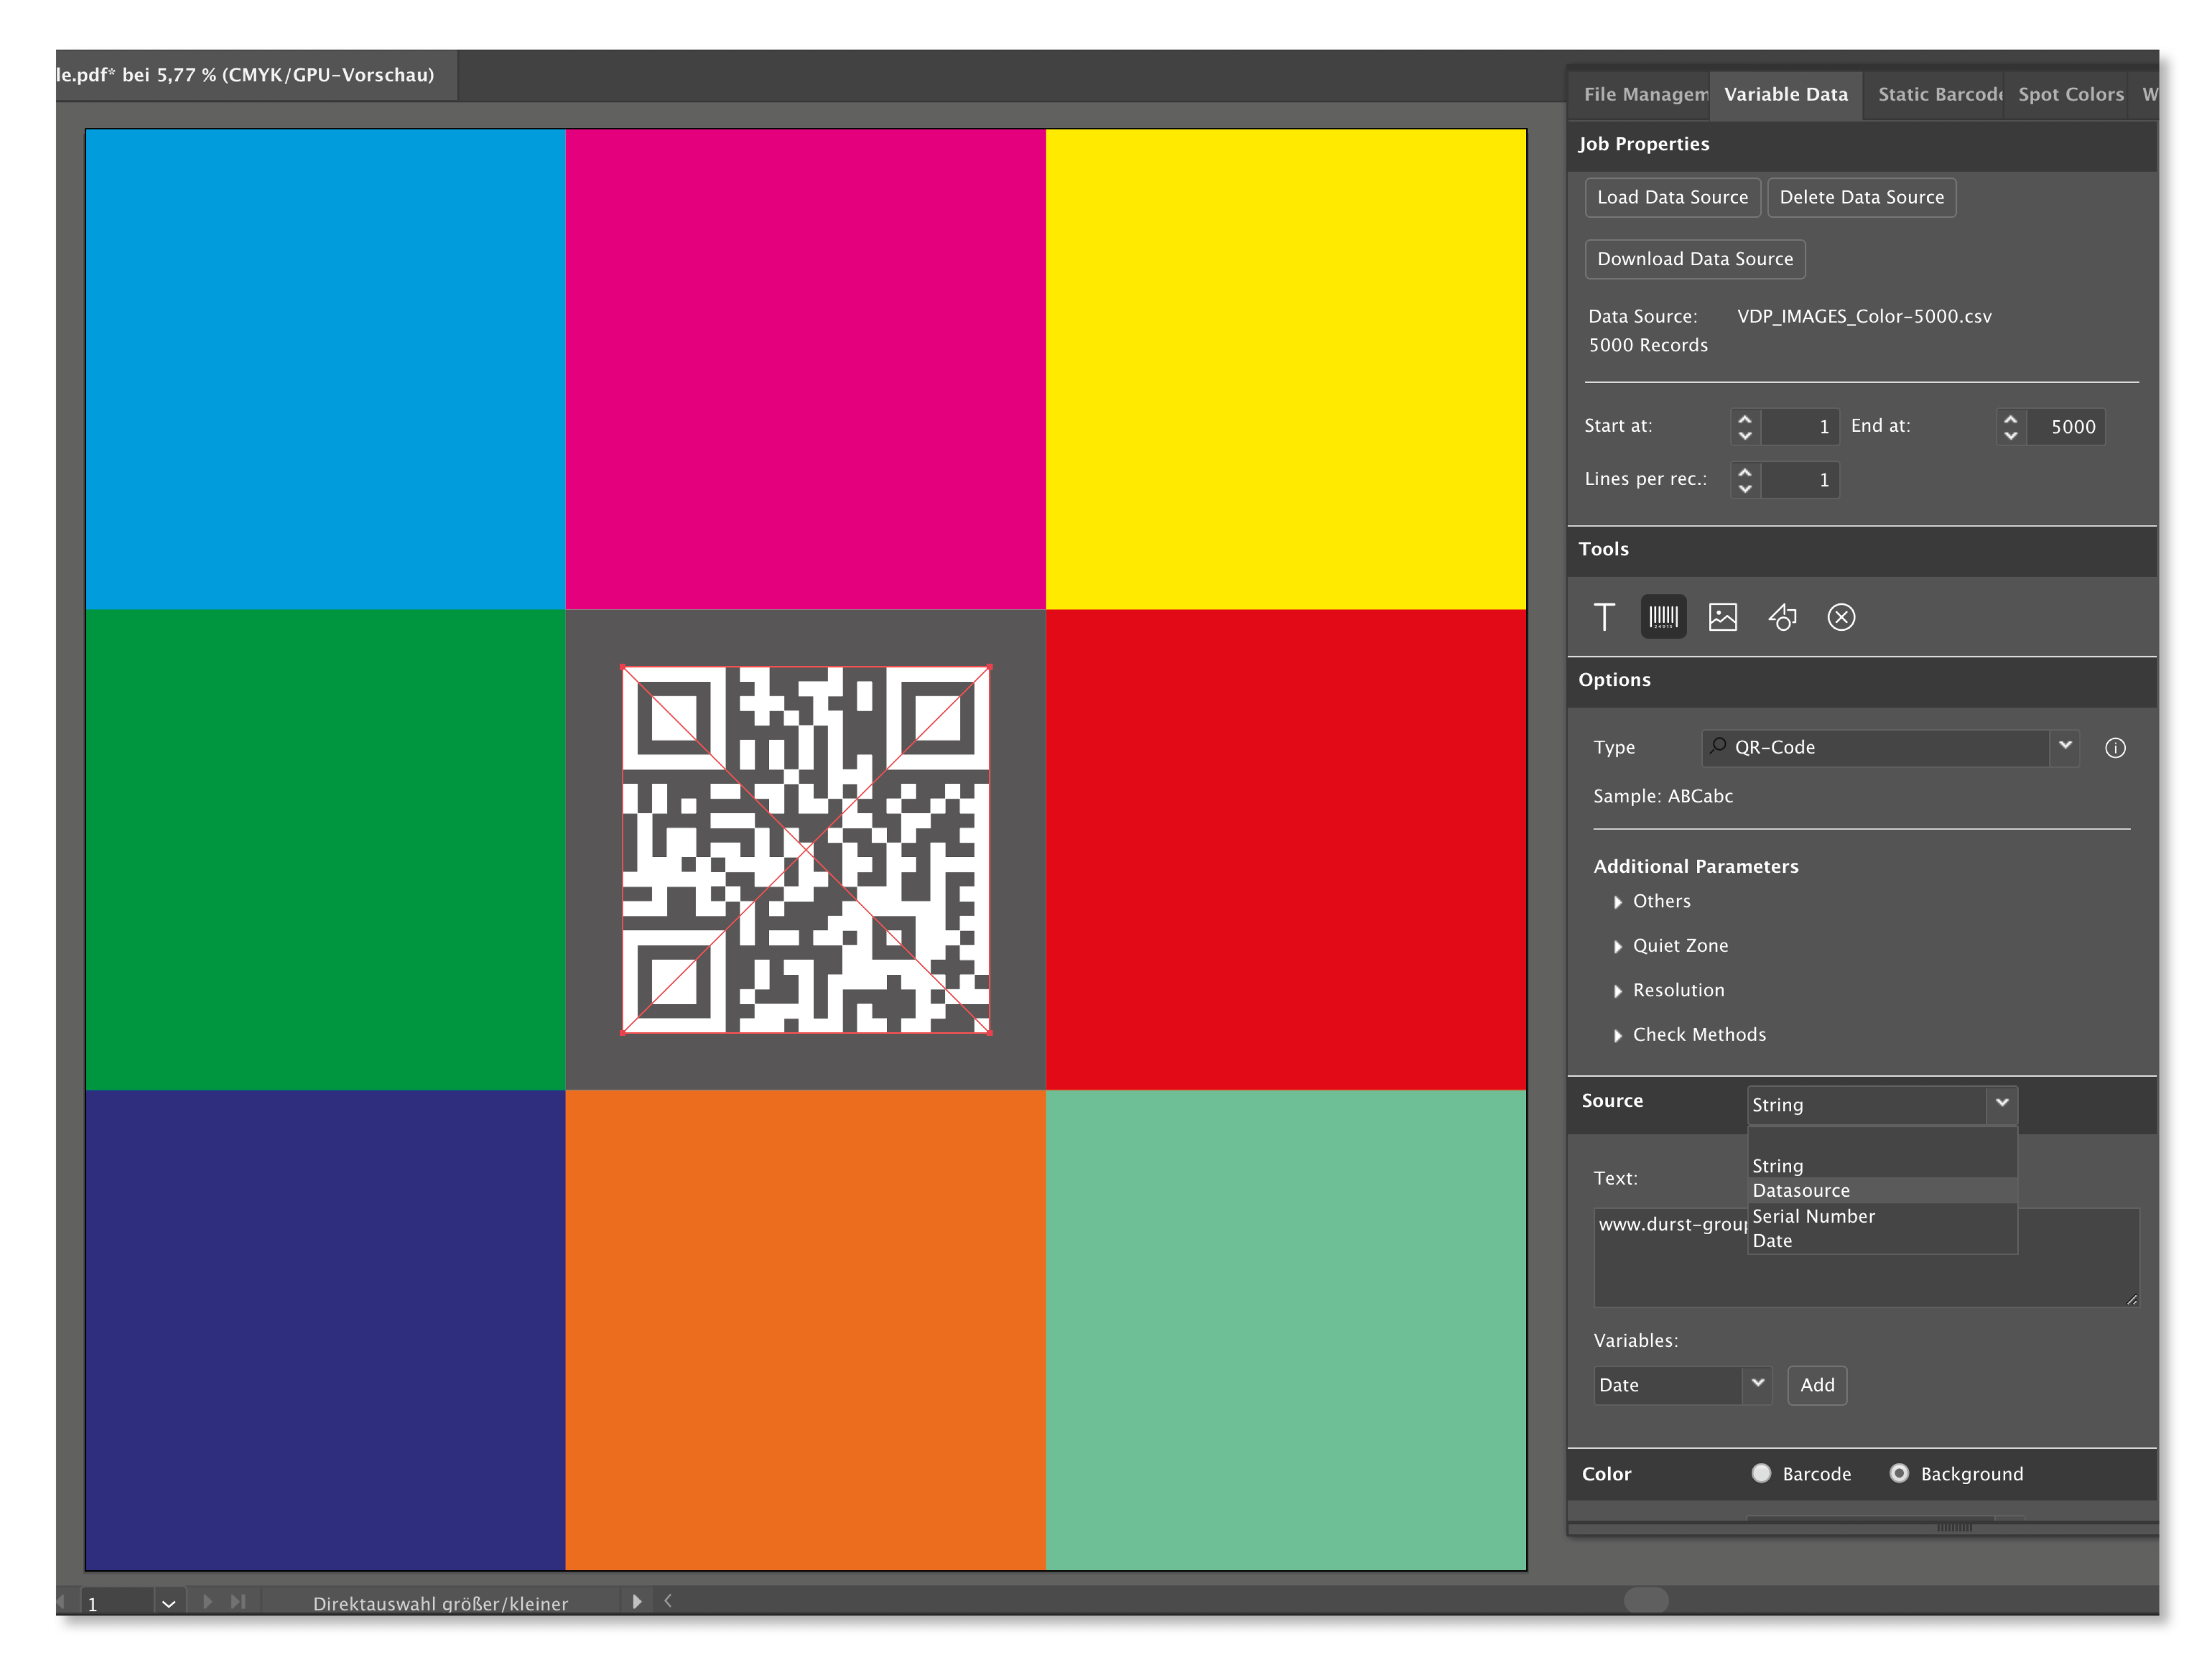
Variable texts, barcodes, images and shapes can be created and there are separate detailed settings for each area. The selected CSV file as well as the modified print file are transferred back into the Workflow, so there is no need for buffering. Likewise, Static Barcodes and serial numbers can be generated dynamically with the Plug-In.

HOTFOLDER
HOTFOLDER
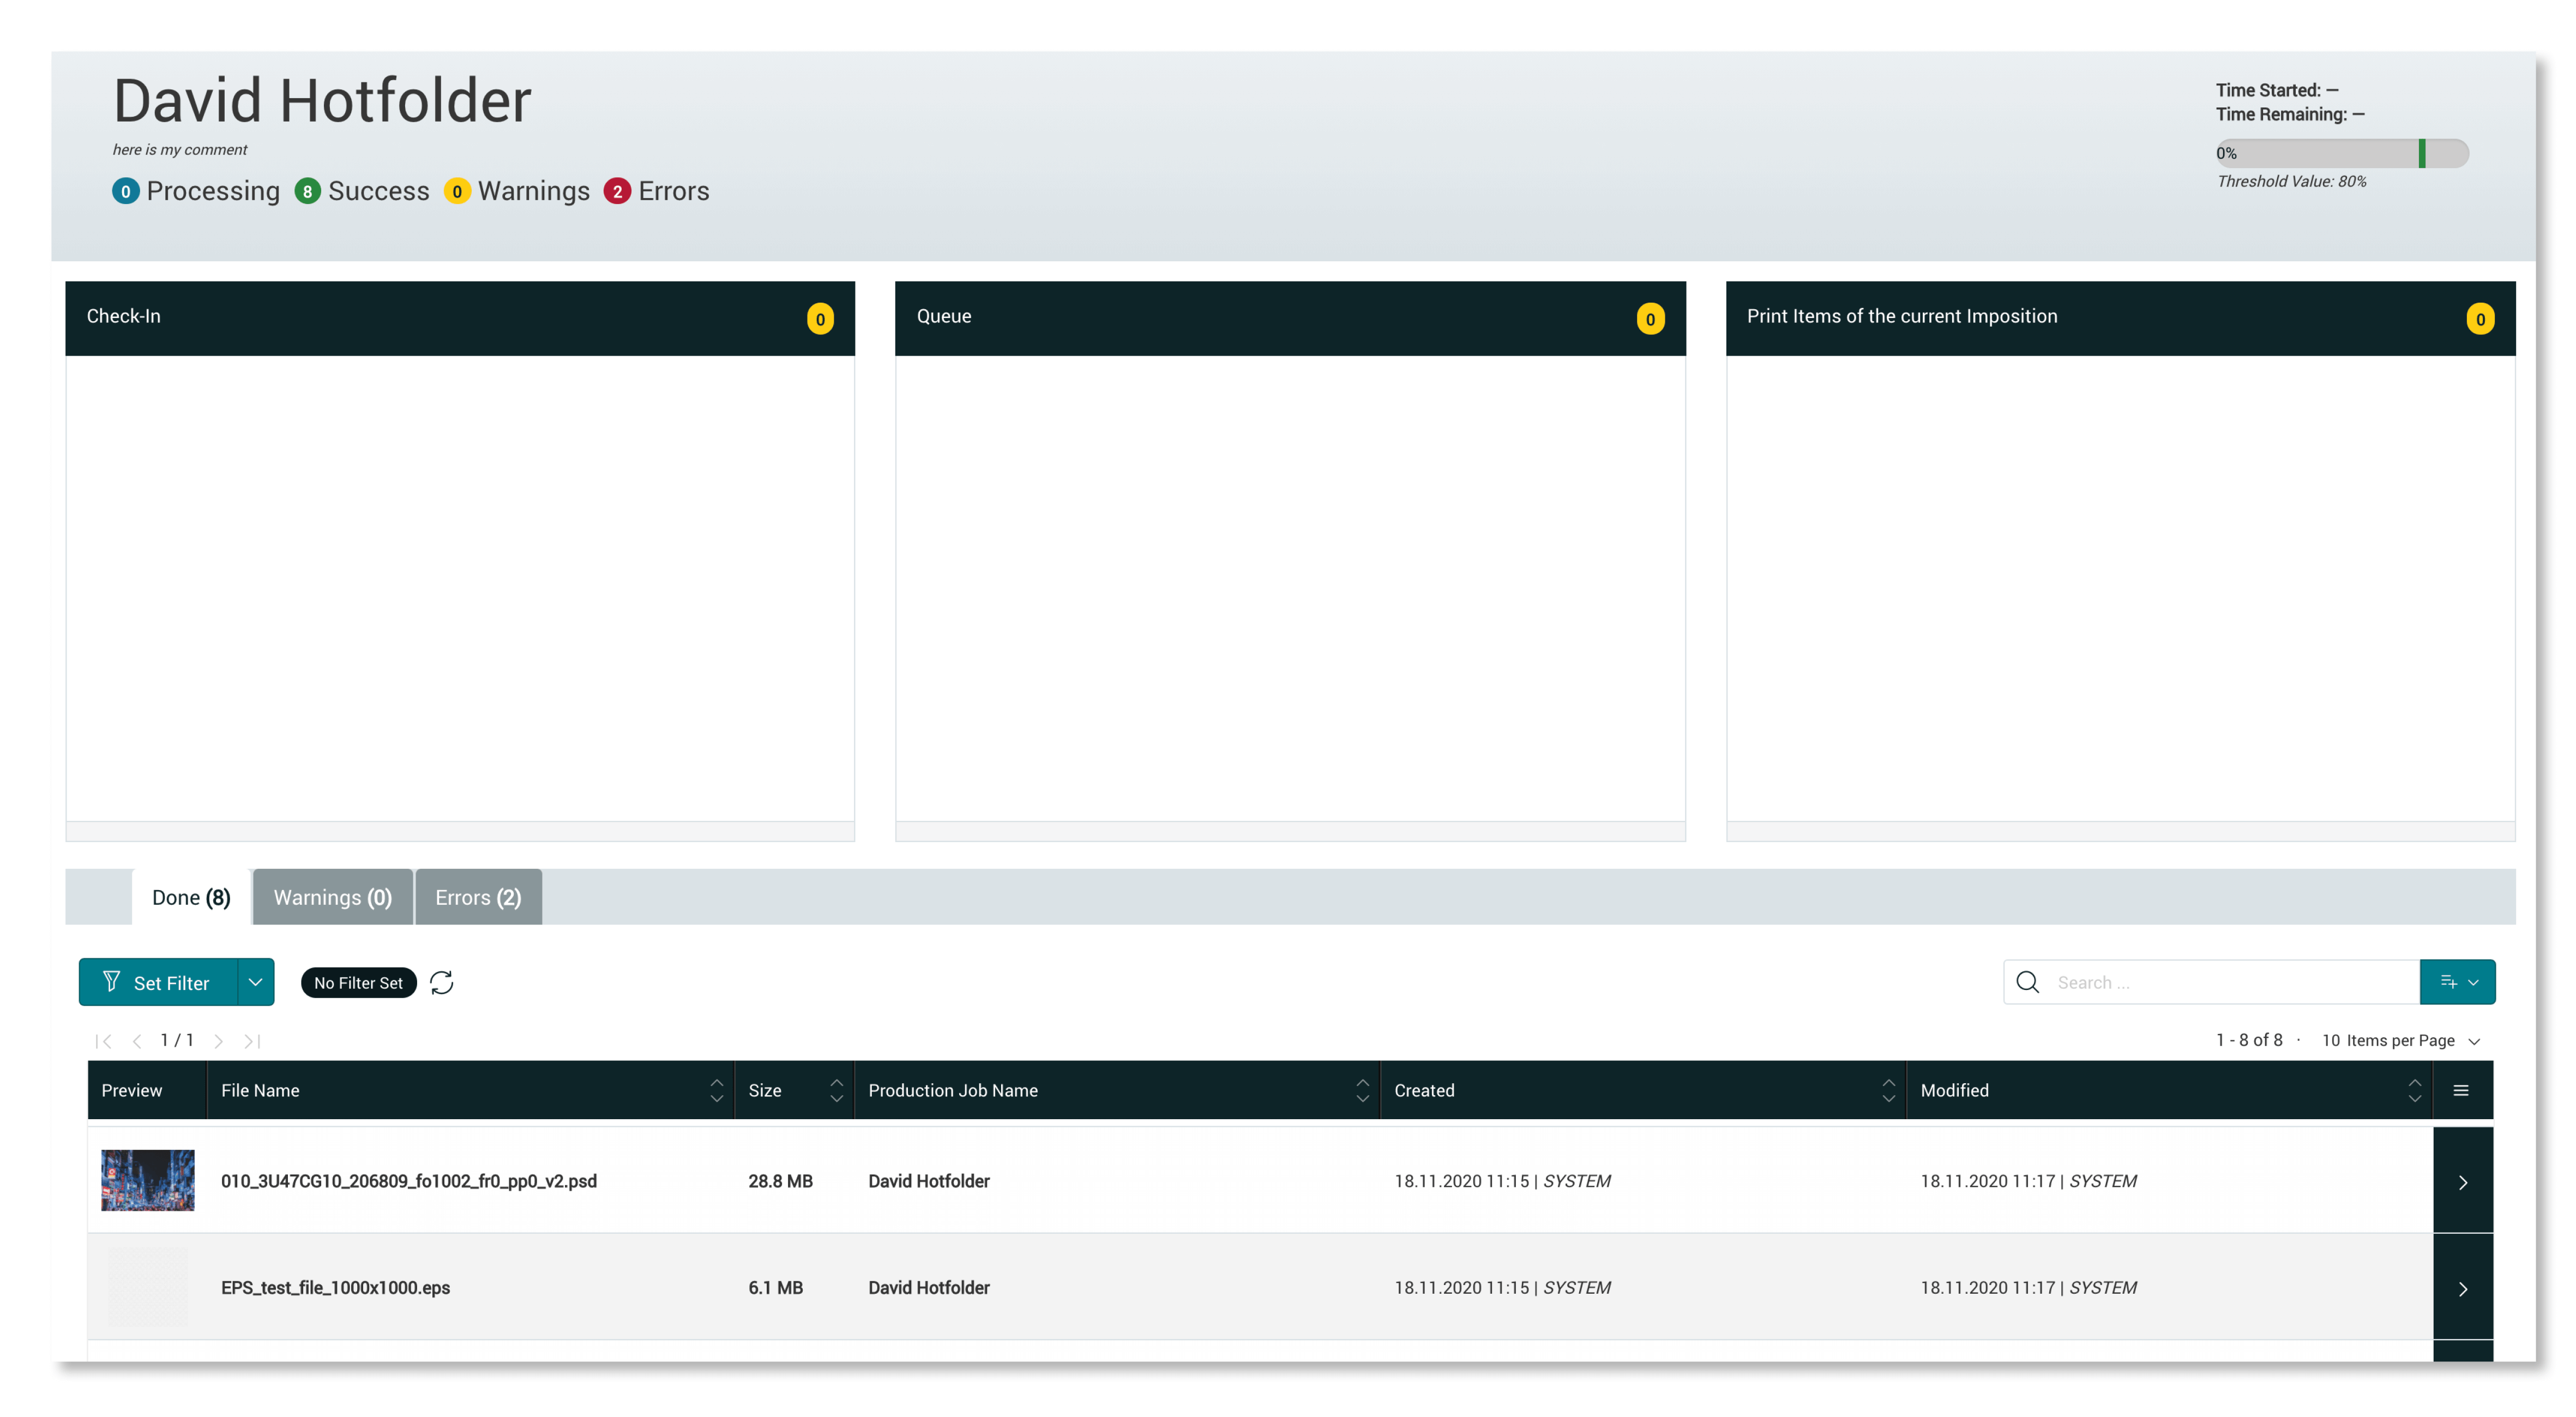
Settings for processing, required render parameters, finishing processes and imposing are available. When imposing, you can decide whether to use Auto-Nesting (Auto Hotfolder), which is a time- and/or area-dependent Nesting, or Single-Nesting (Single Hotfolder). As the word implies, ZIP files containing a complete production orders can be processed in using ZIP hotfolders.

VERSIONING
VERSIONING
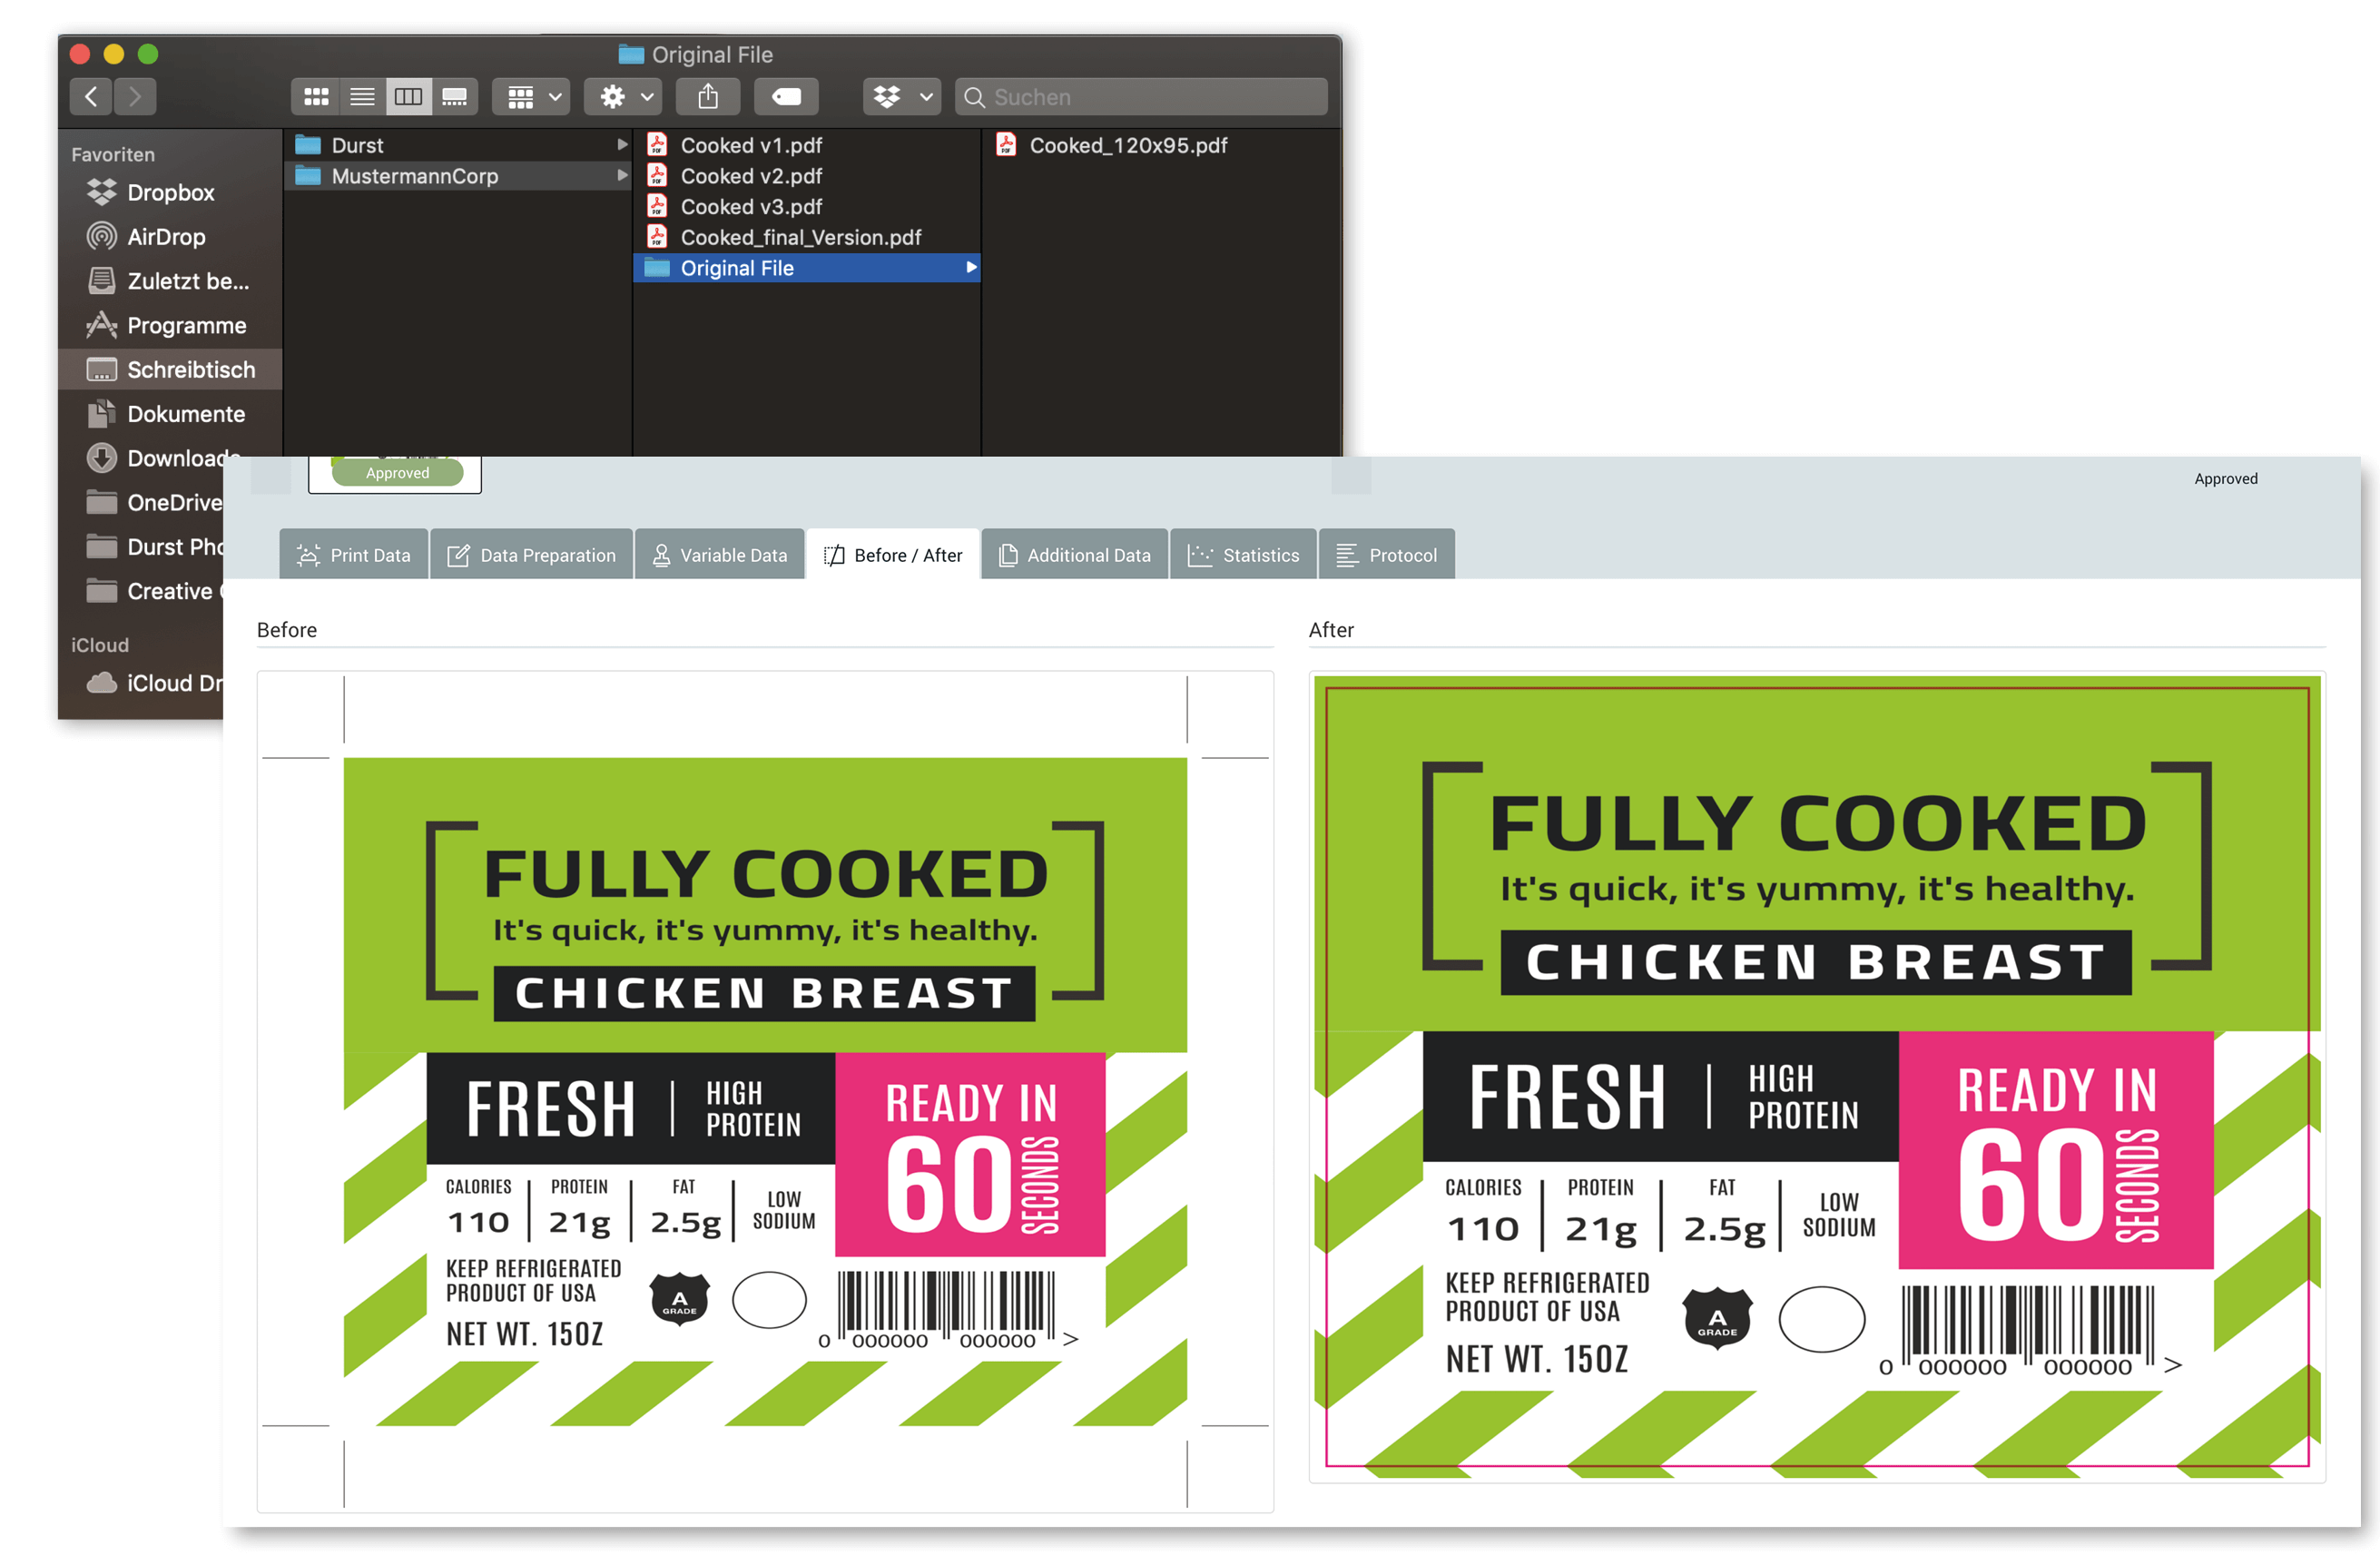
During check-in, all compatible file formats are converted into a PDF. While a copy of the original file is kept unchanged, a new version is created after the file has been altered using: Fixups, Fixup Chains or Adobe Illustrator. It is always possible to switch back to previous versions stored in the Workflow.

MATERIAL SAVINGS
MATERIAL SAVINGS
If this function is selected, an algorithm starts, which optimizes the imposition. Depending on the print data, the user may be presented with several versions of the optimization, and the preferred version can be applied and saved.

REST API
REST API
When integrating with leading systems, we provide detailed documentation to guarantee correct usage and control. If this is not sufficient or the leading system is not compatible, a communication server can be provided at an additional cost.

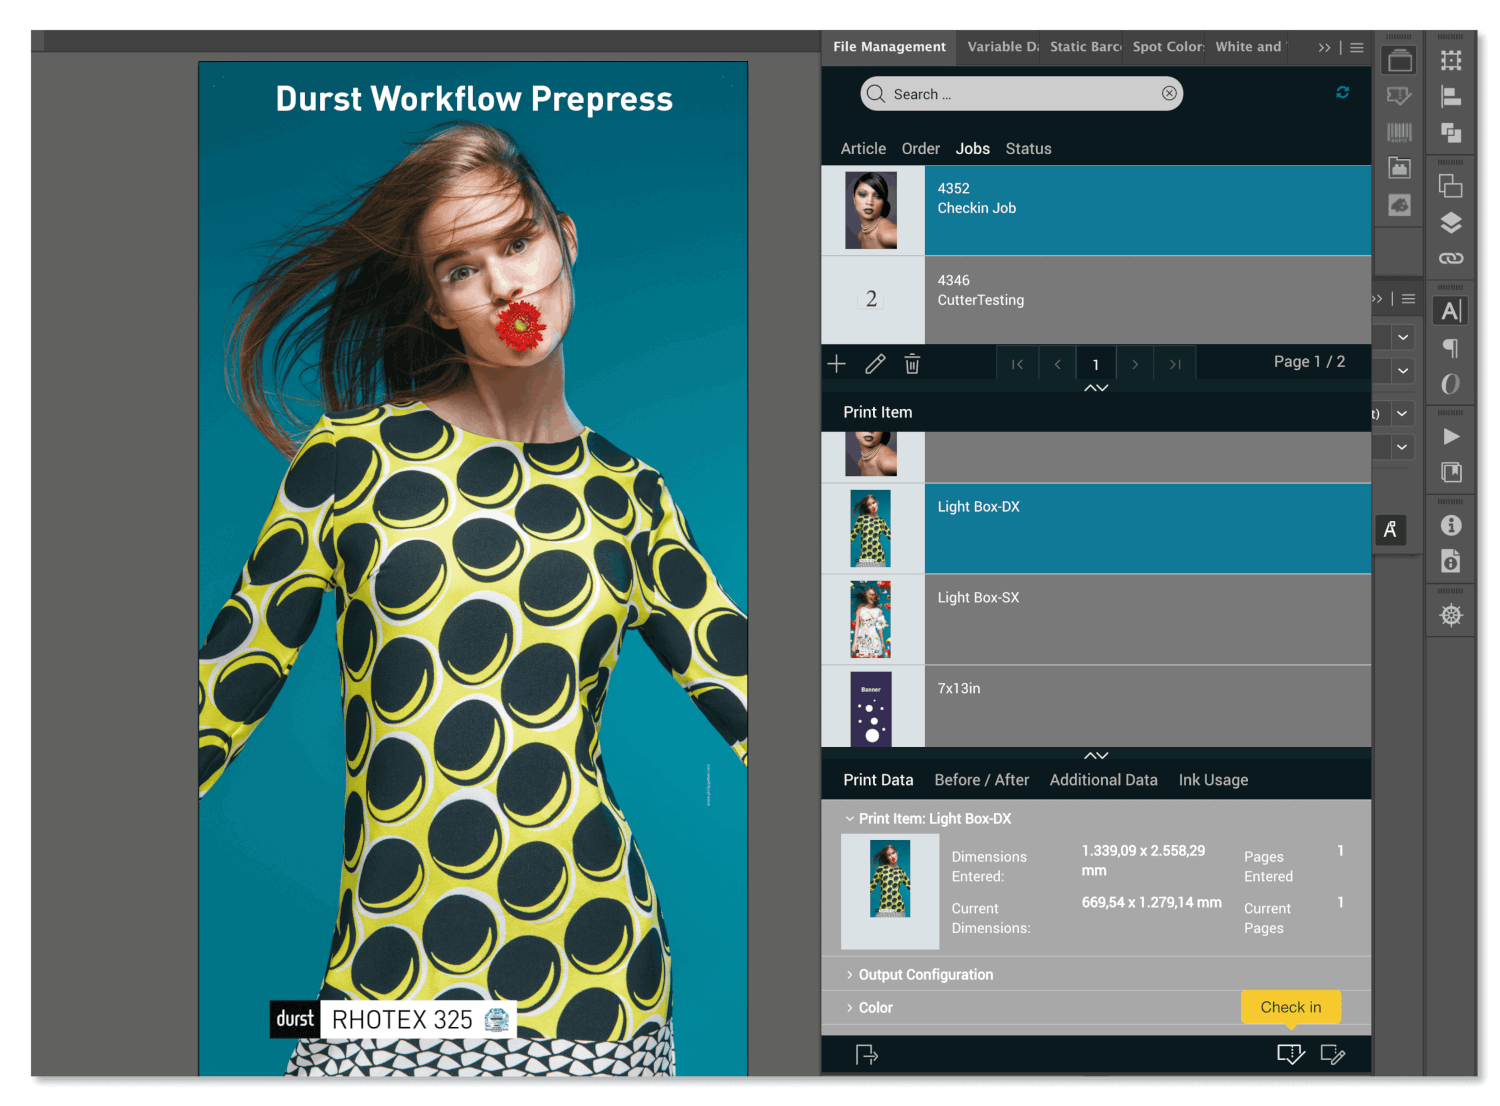
FILE MANAGEMENT
FILE MANAGEMENT
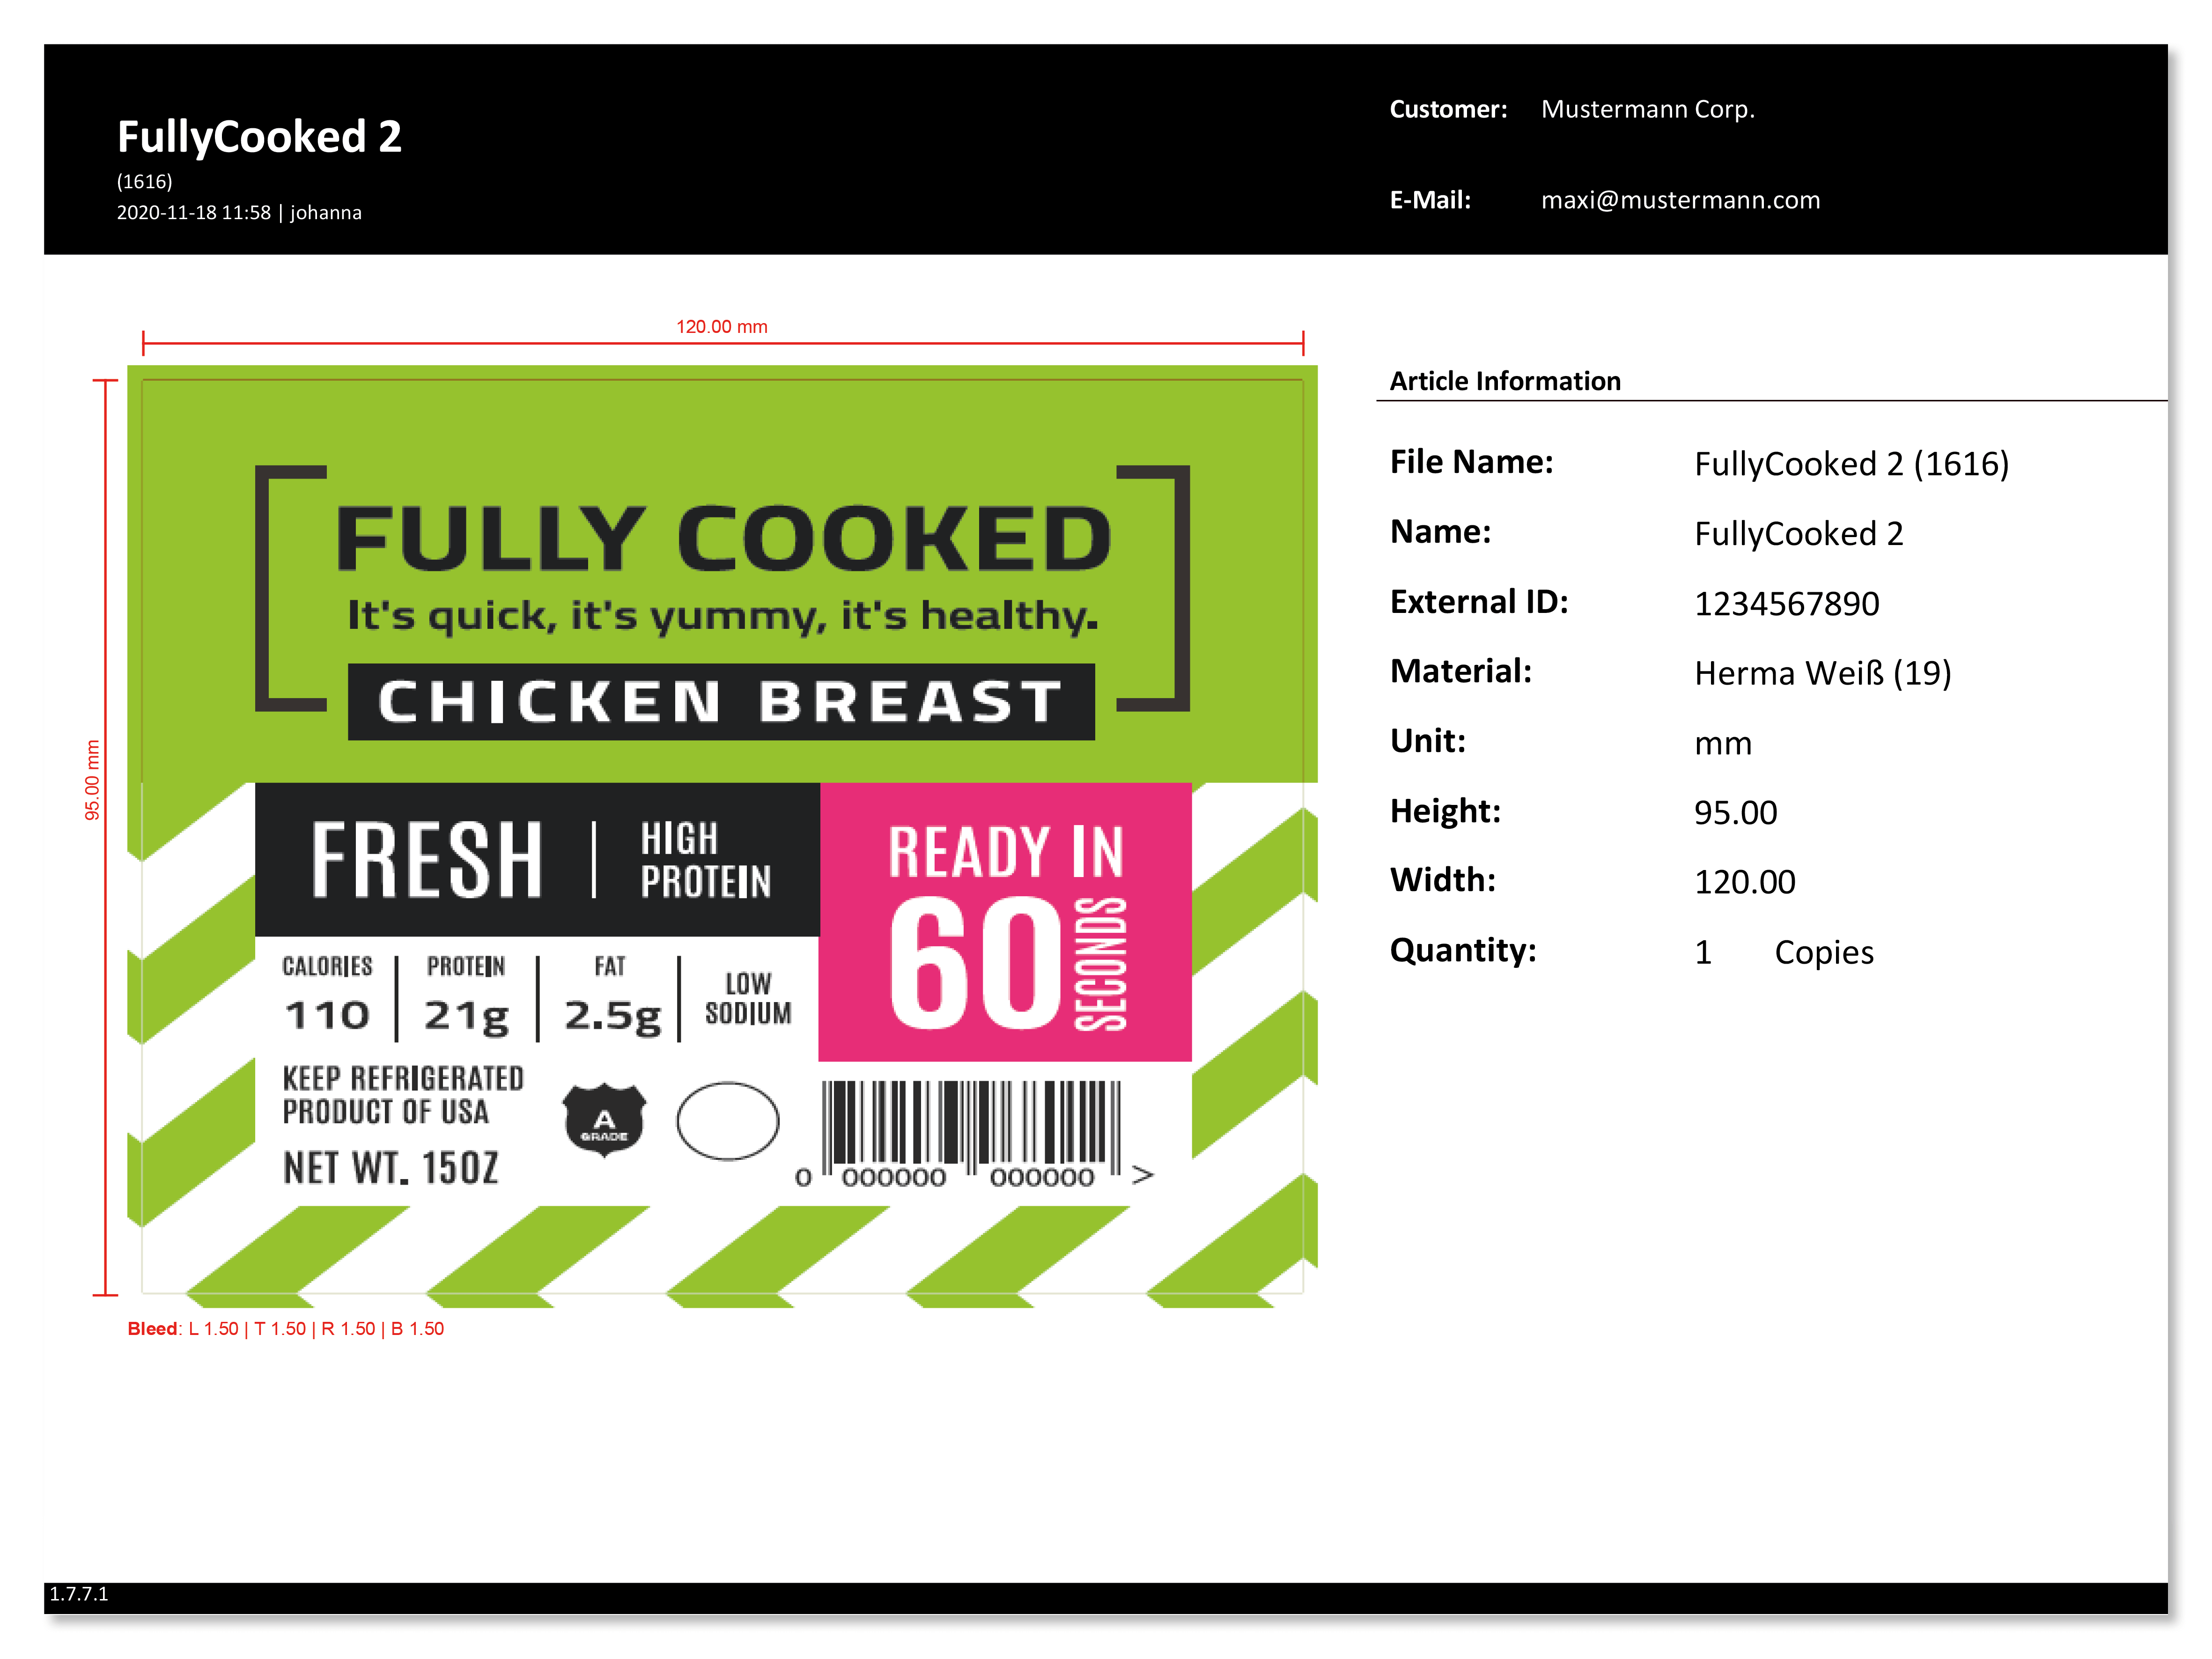
Regarding Orders, the user should specify all relevant information concerning the production job and customer. Orders can contain the most diverse materials and print data specifically for a particular customer. Data in a production job is in the final stage before production and can still be edited here if necessary. Print data is stored in the system with the associated production and job related information, to make job reproduction consistent and easy.

STATUS
STATUS
In all print data or job list views, the user can apply a filter using specific information and criteria. A filter can be selected for a print item or job status. This makes it possible to see at a glance which production status jobs or Print items have.

SPOT COLOR MATCHING
SPOT COLOR MATCHING
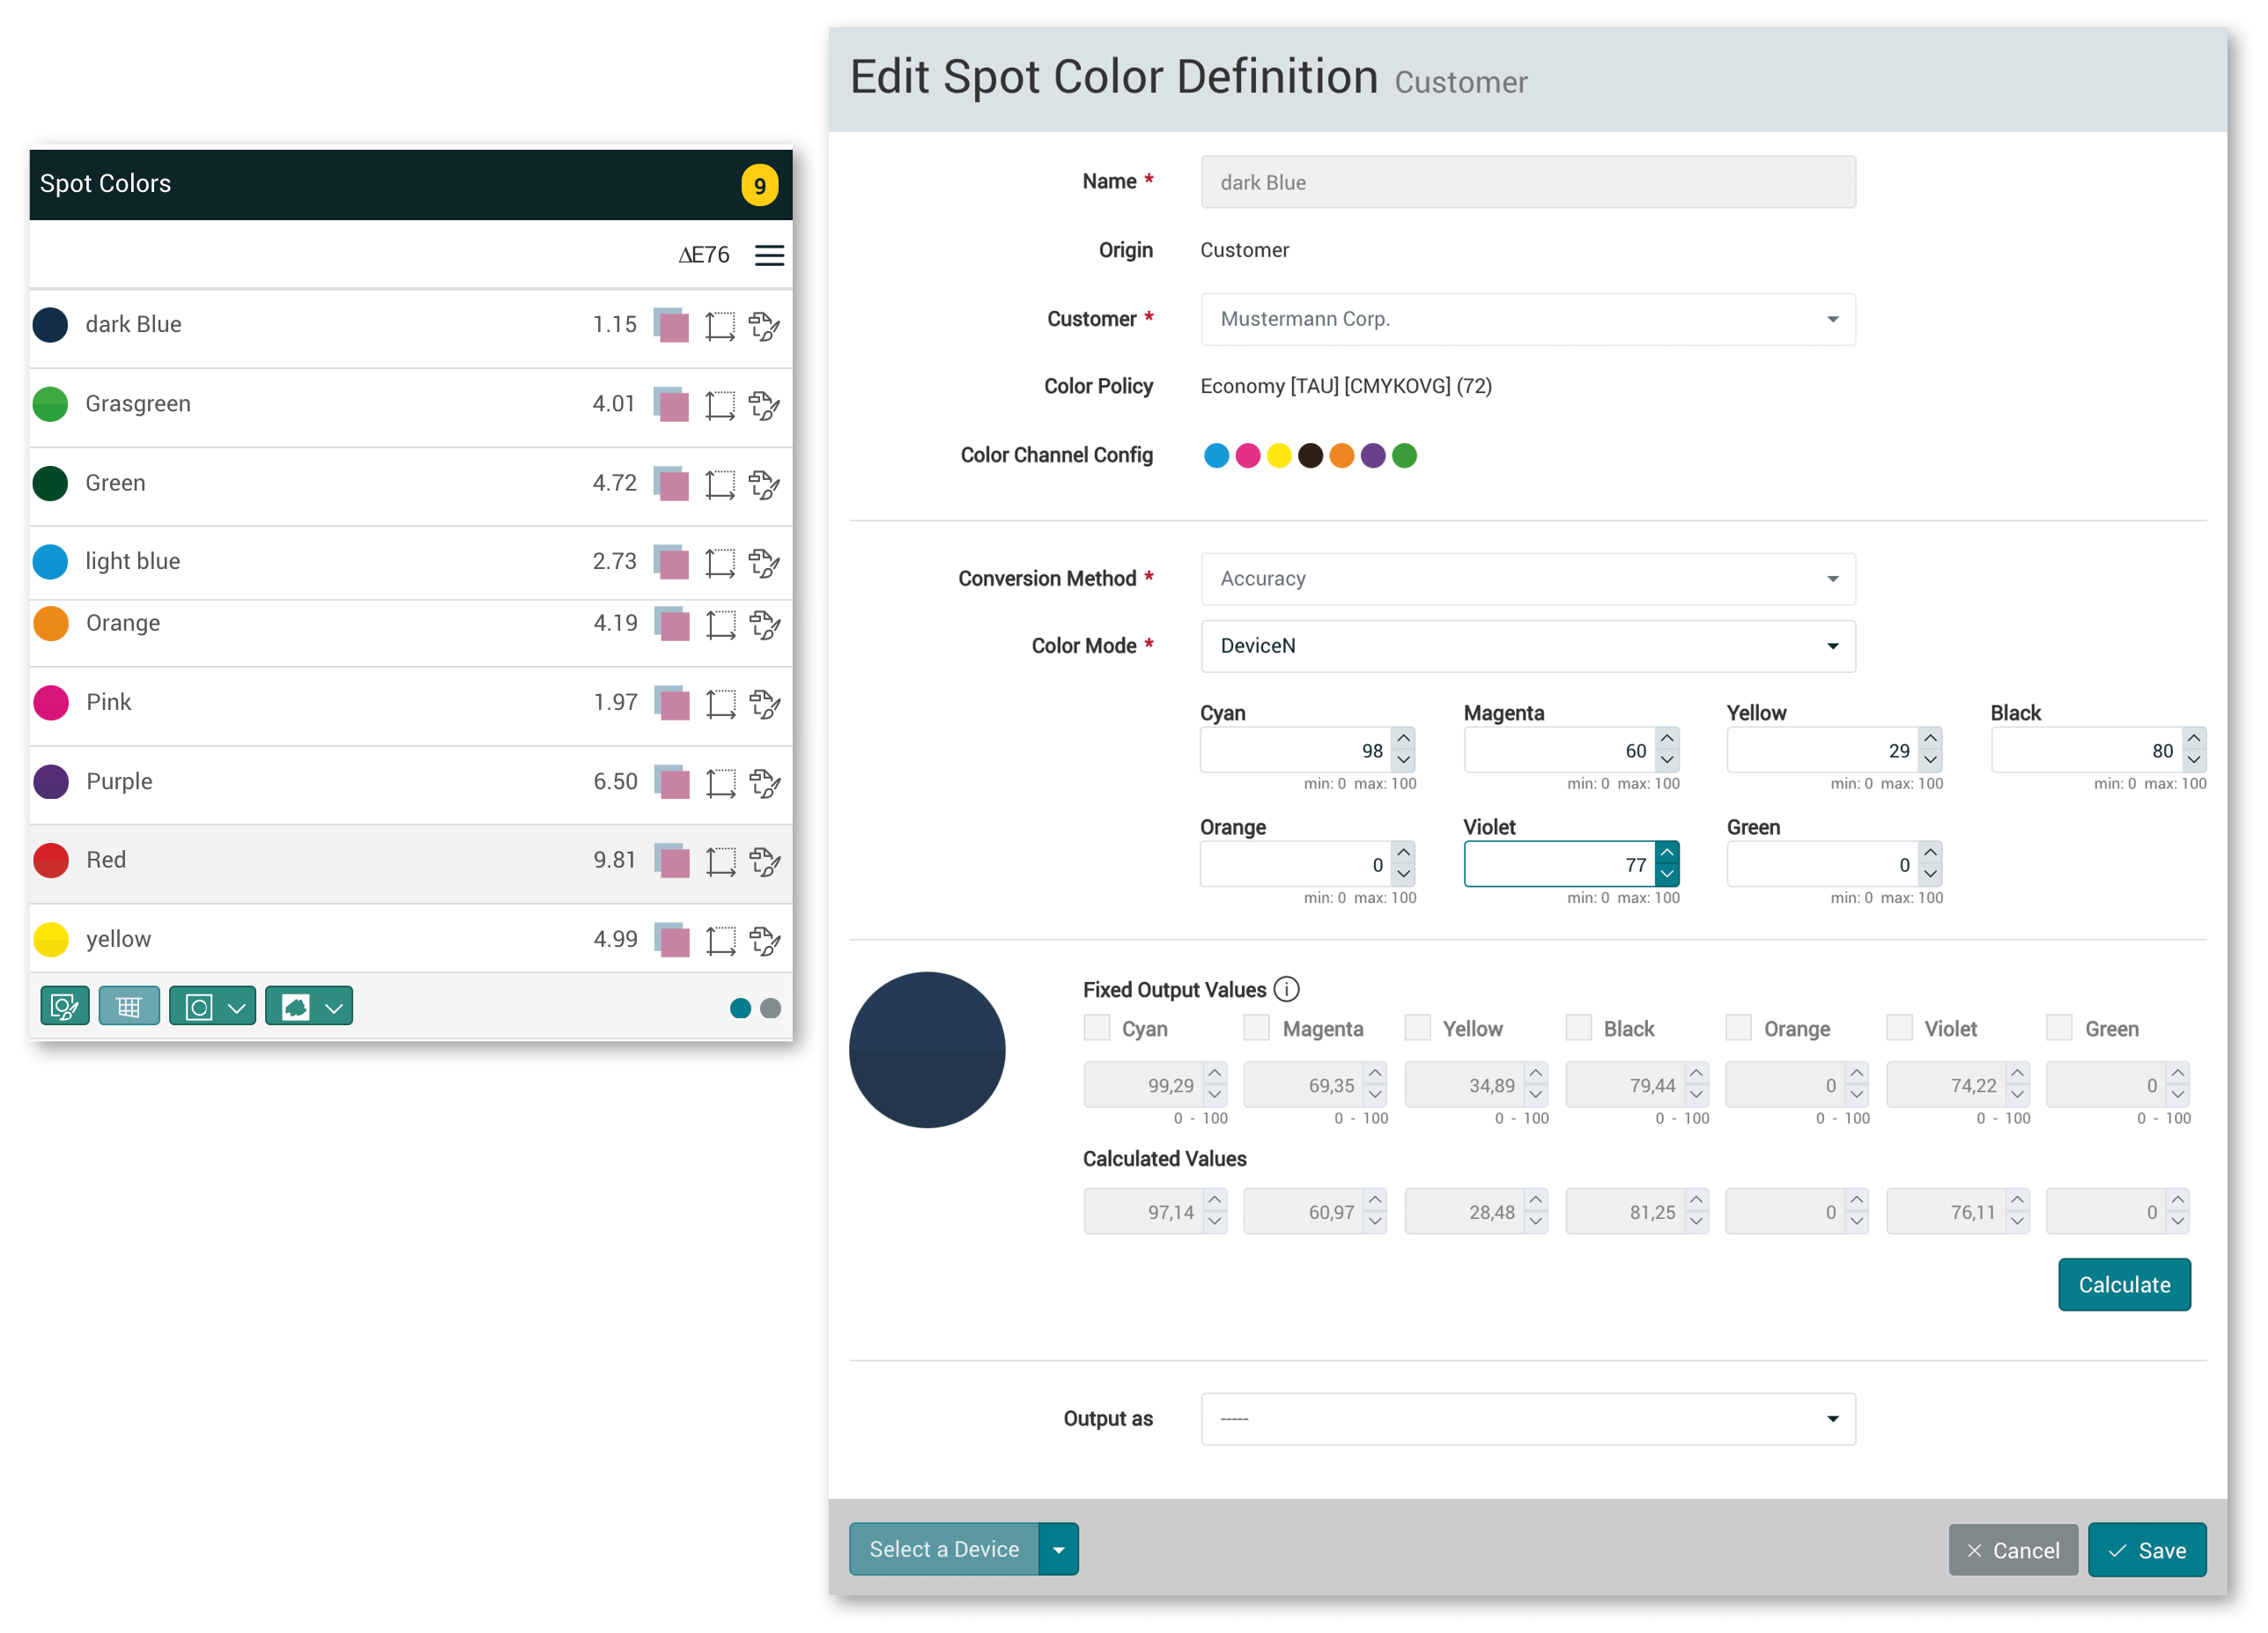
Common color libraries can be uploaded in the Prepress Workflow. If this is saved in the system, the stored values are always accessed automatically. Customer colors can also be saved with defined color values in just a few steps. If a file with a stored color name is uploaded, the system automatically accesses the stored values.